


Let's take a look at how we can enable the commenting functionality on New Zenler Blogs.
In this post we're going to cover two separate methods of inserting comments to your blog posts.
Method 1: Using Disqus Comments
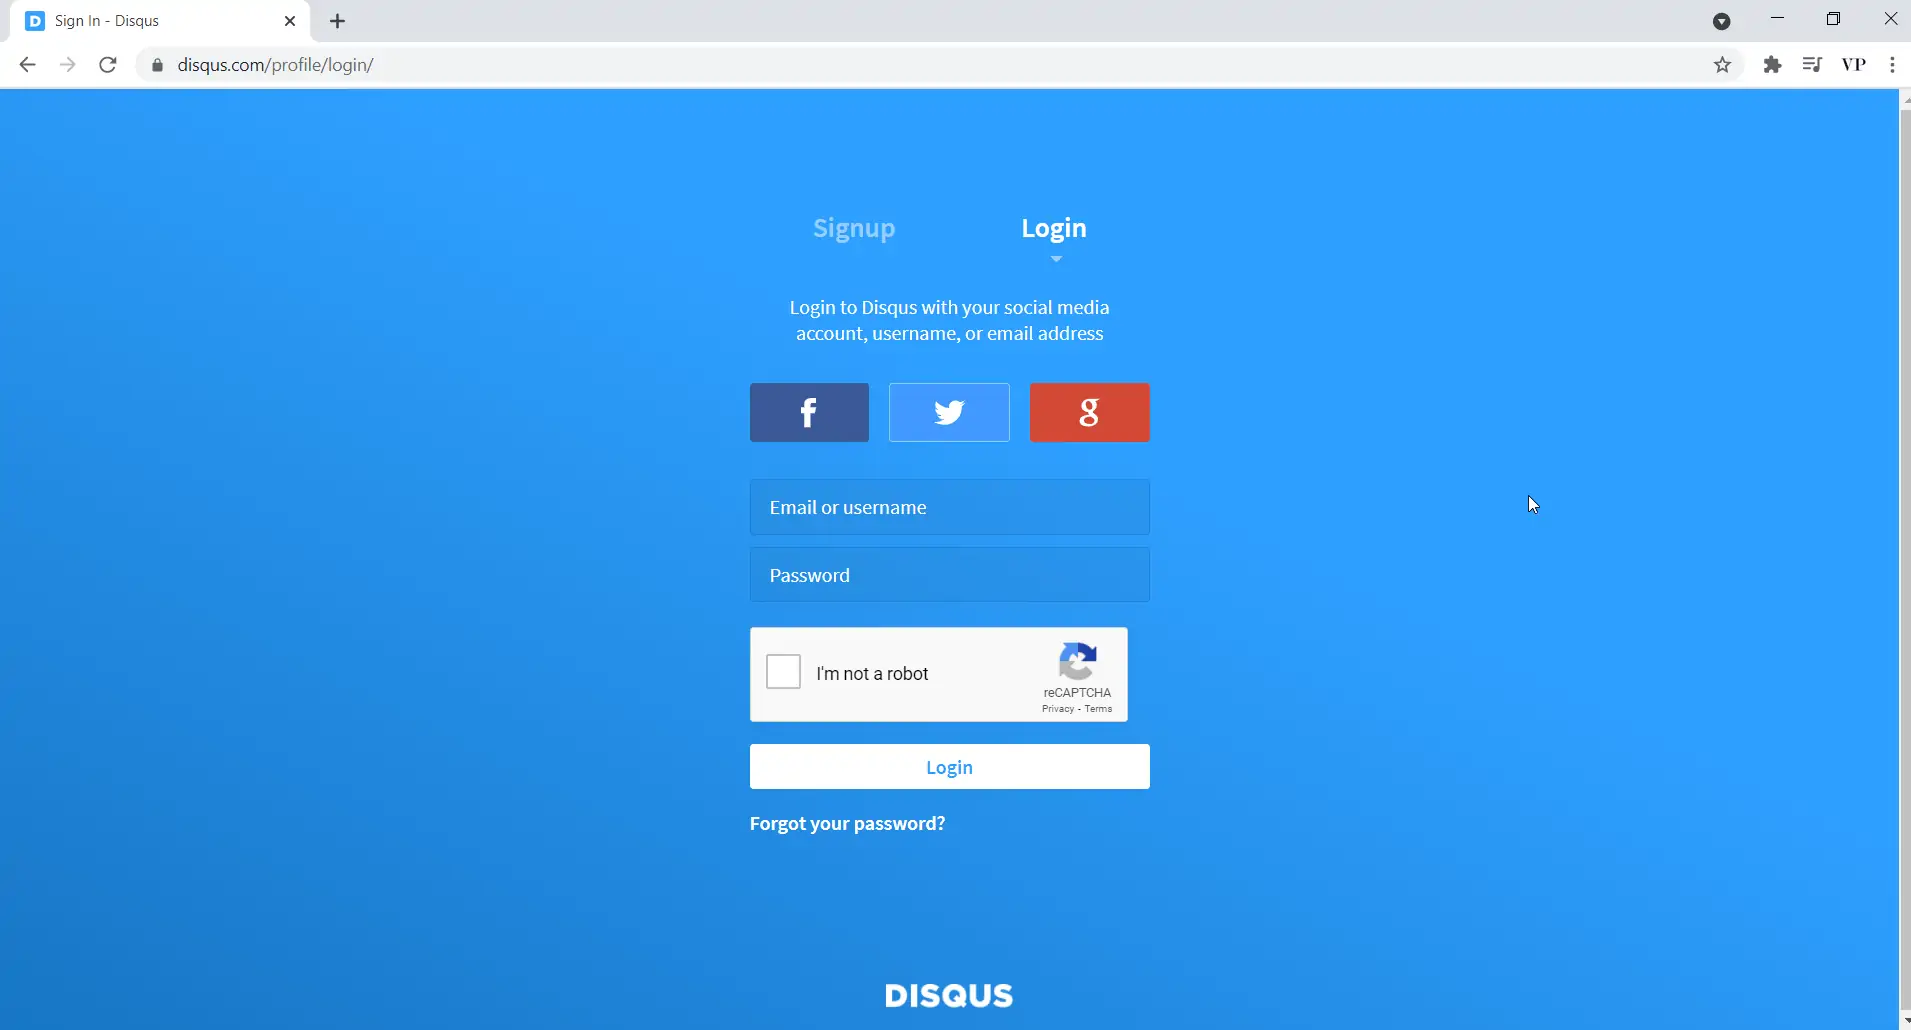
Step 1 > Sign up on Disqus.
Create a free account on Disqus by using this link.

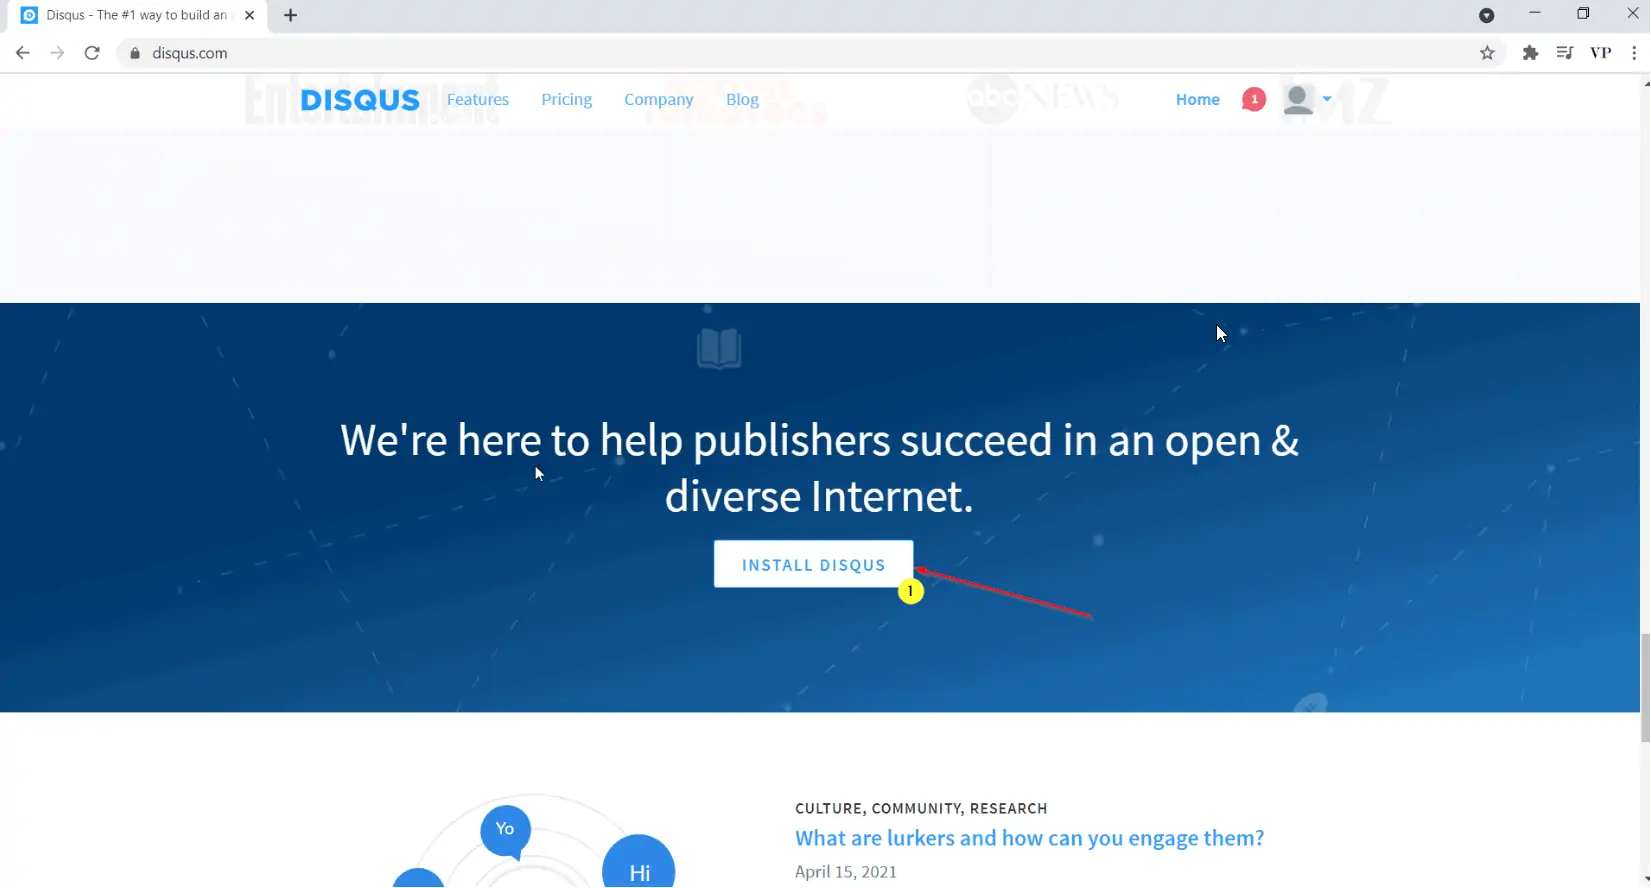
Step 2 > Install Discuss on your New Zenler site.
After you create an account and sign in to Disqus, scroll down on the next page and click on "Install Disqus".

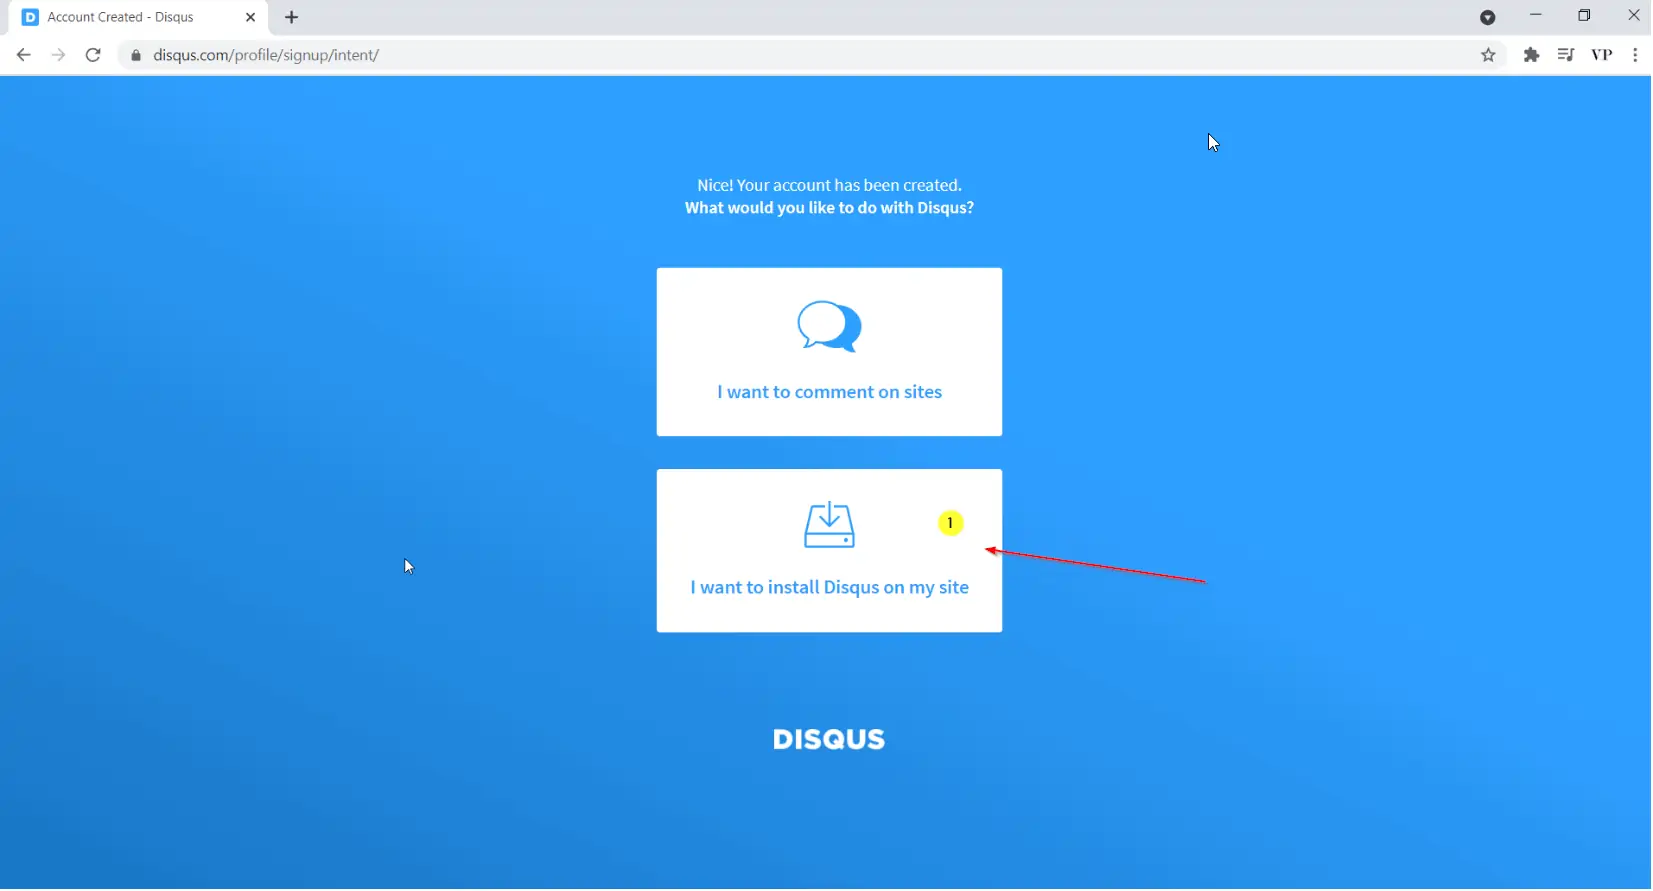
On the next page, click on the second option, "I want to install Disqus on my site" to proceed to create a Disqus site.

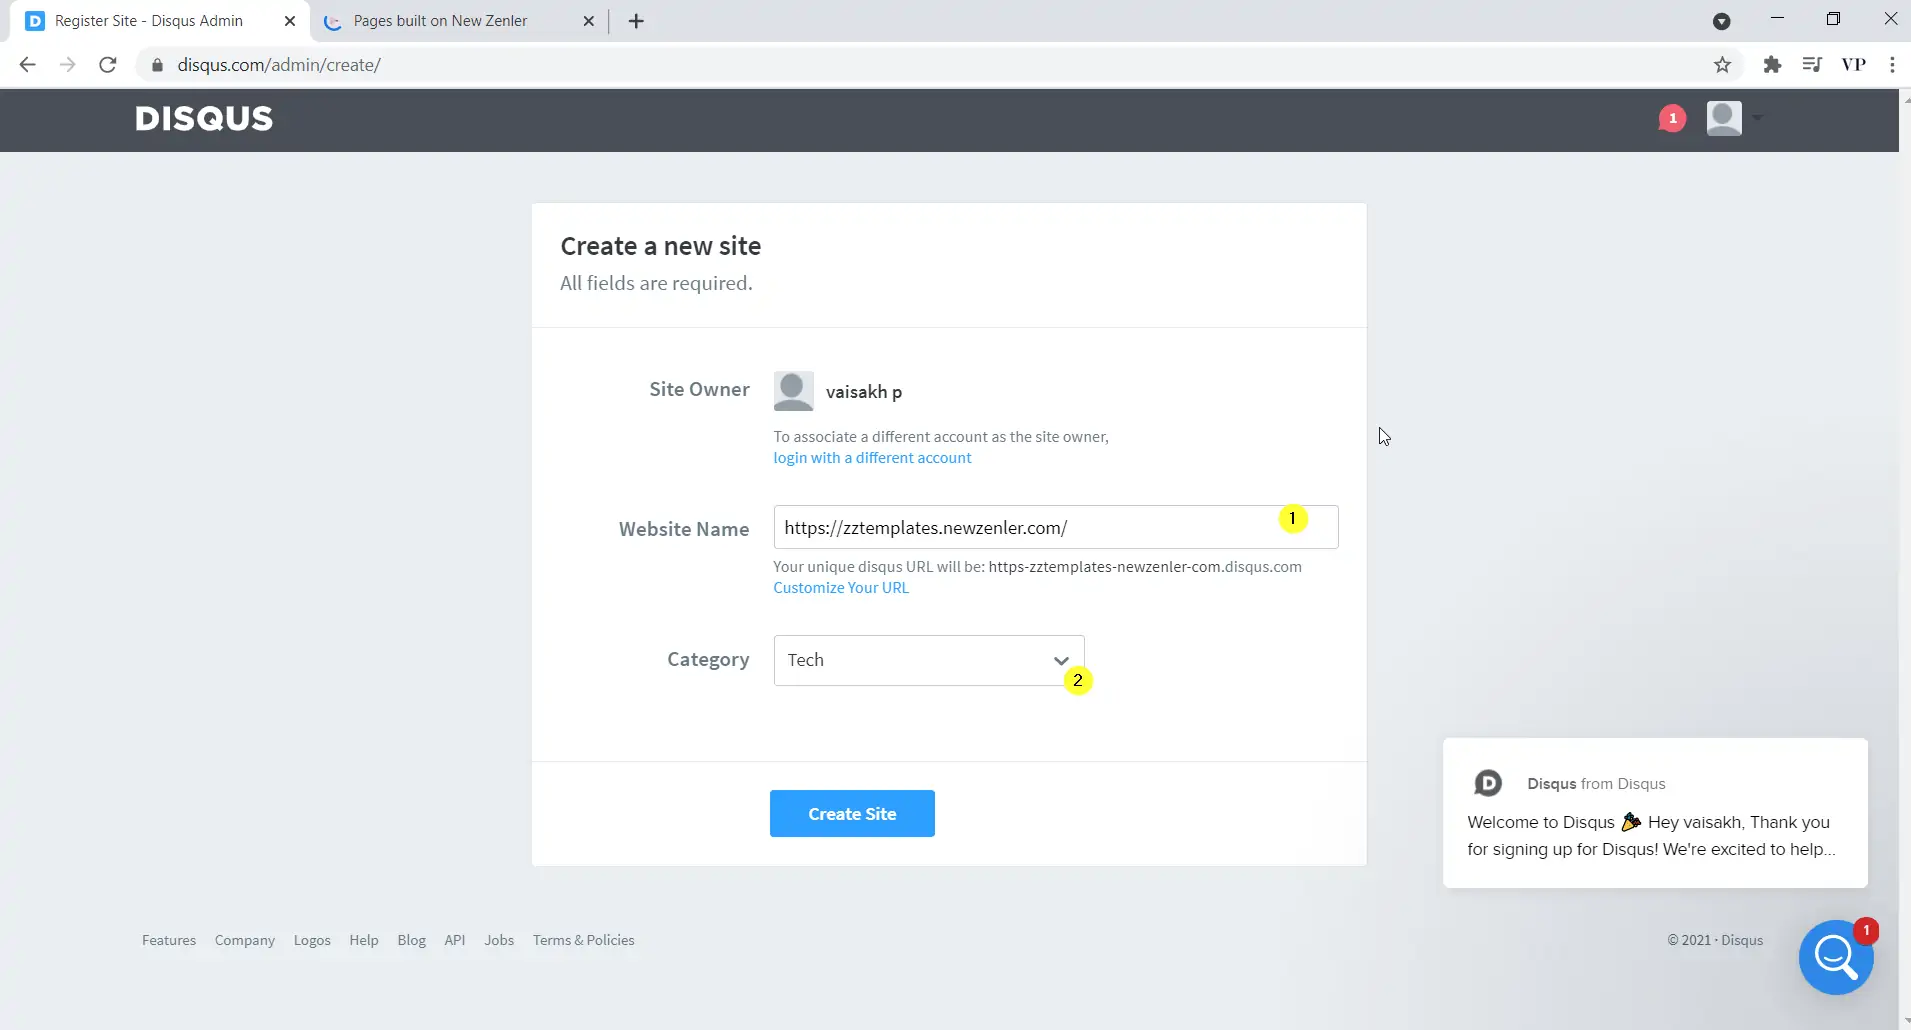
Step 3 > Create and set up Discuss site.
On the next page, put in your website name (New Zenler Site URL) and also Category. Then click on Create Site.

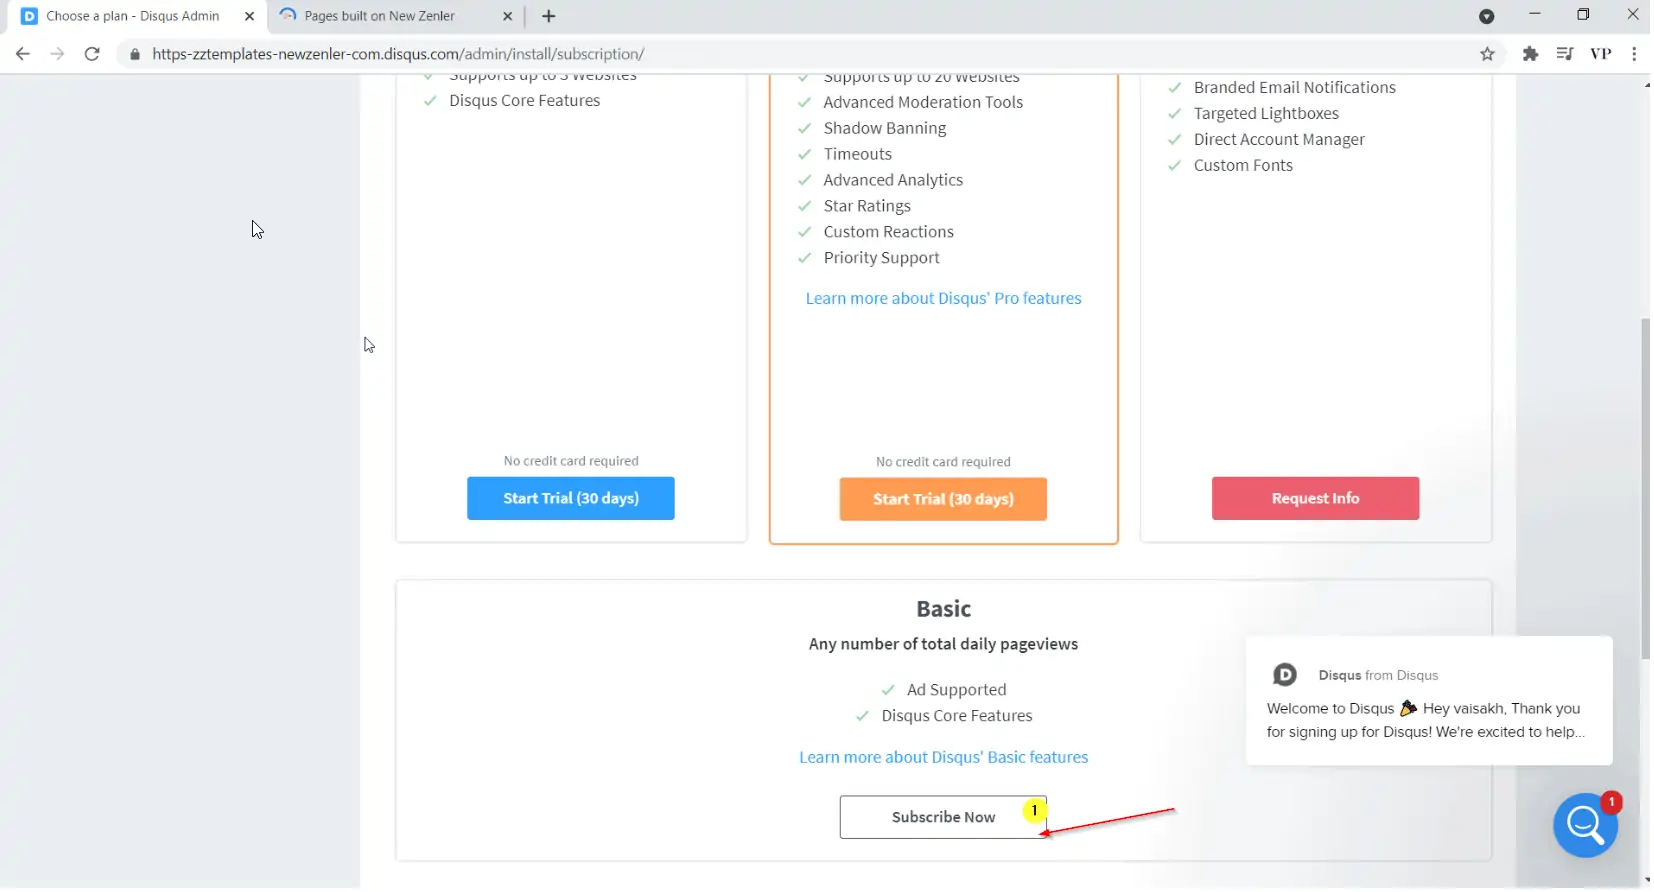
On the next page, scroll down and select the Basic plan ( which is the free plan. if you want to use other features, you can go with a paid plan) by clicking "Subscribe Now".

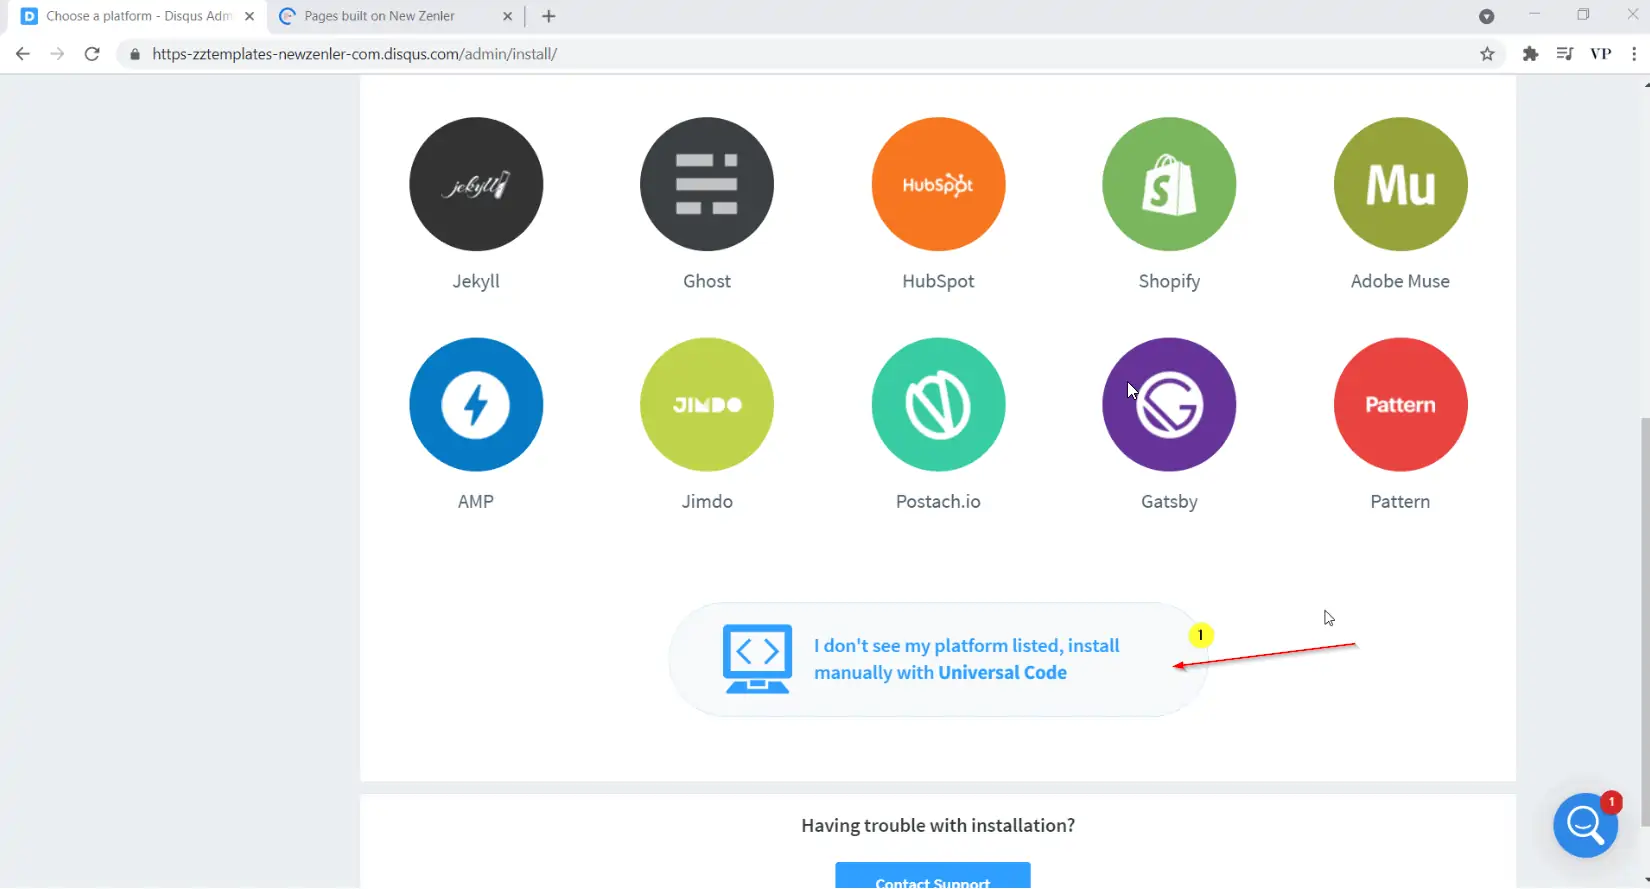
On the next page, scroll down and select " I don't see my platform listed, install manually with universal code" (If you are not using New Zenler and your platform is listed, you can select that and set up in a different method.)

Step 4 > Get the code for Disqus Comments.
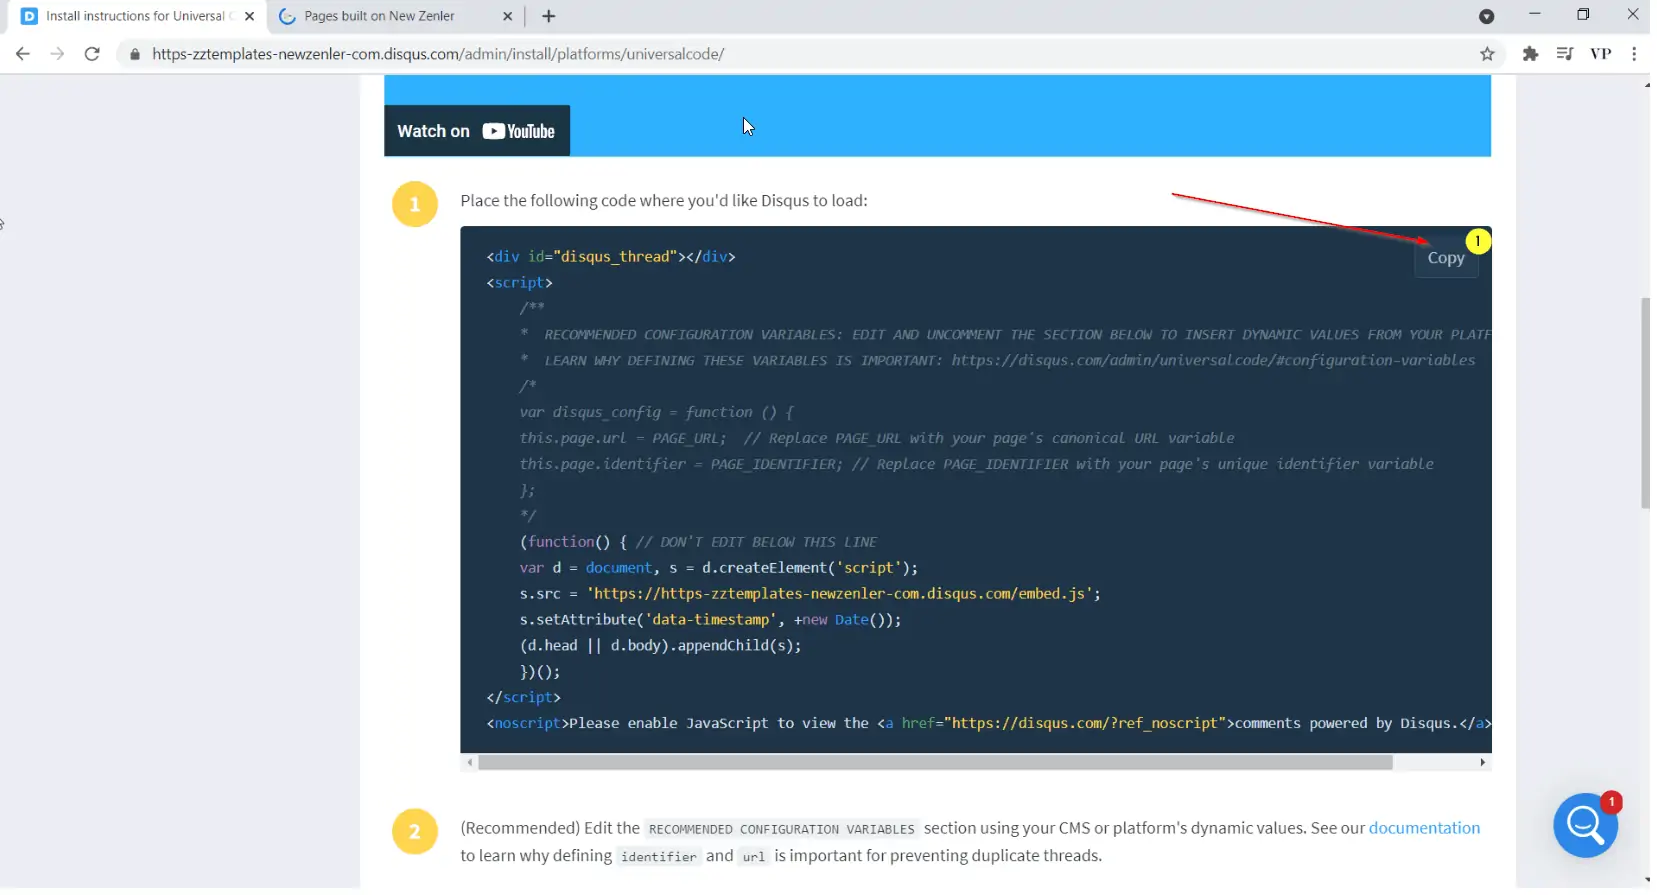
On the next page, scroll down where you see the HTML/Javascript code for the Diqus comment plugin. Click on "Copy" at the top-right corner to copy the entire code.

Step 5 > Setting up the blog on New Zenler side.
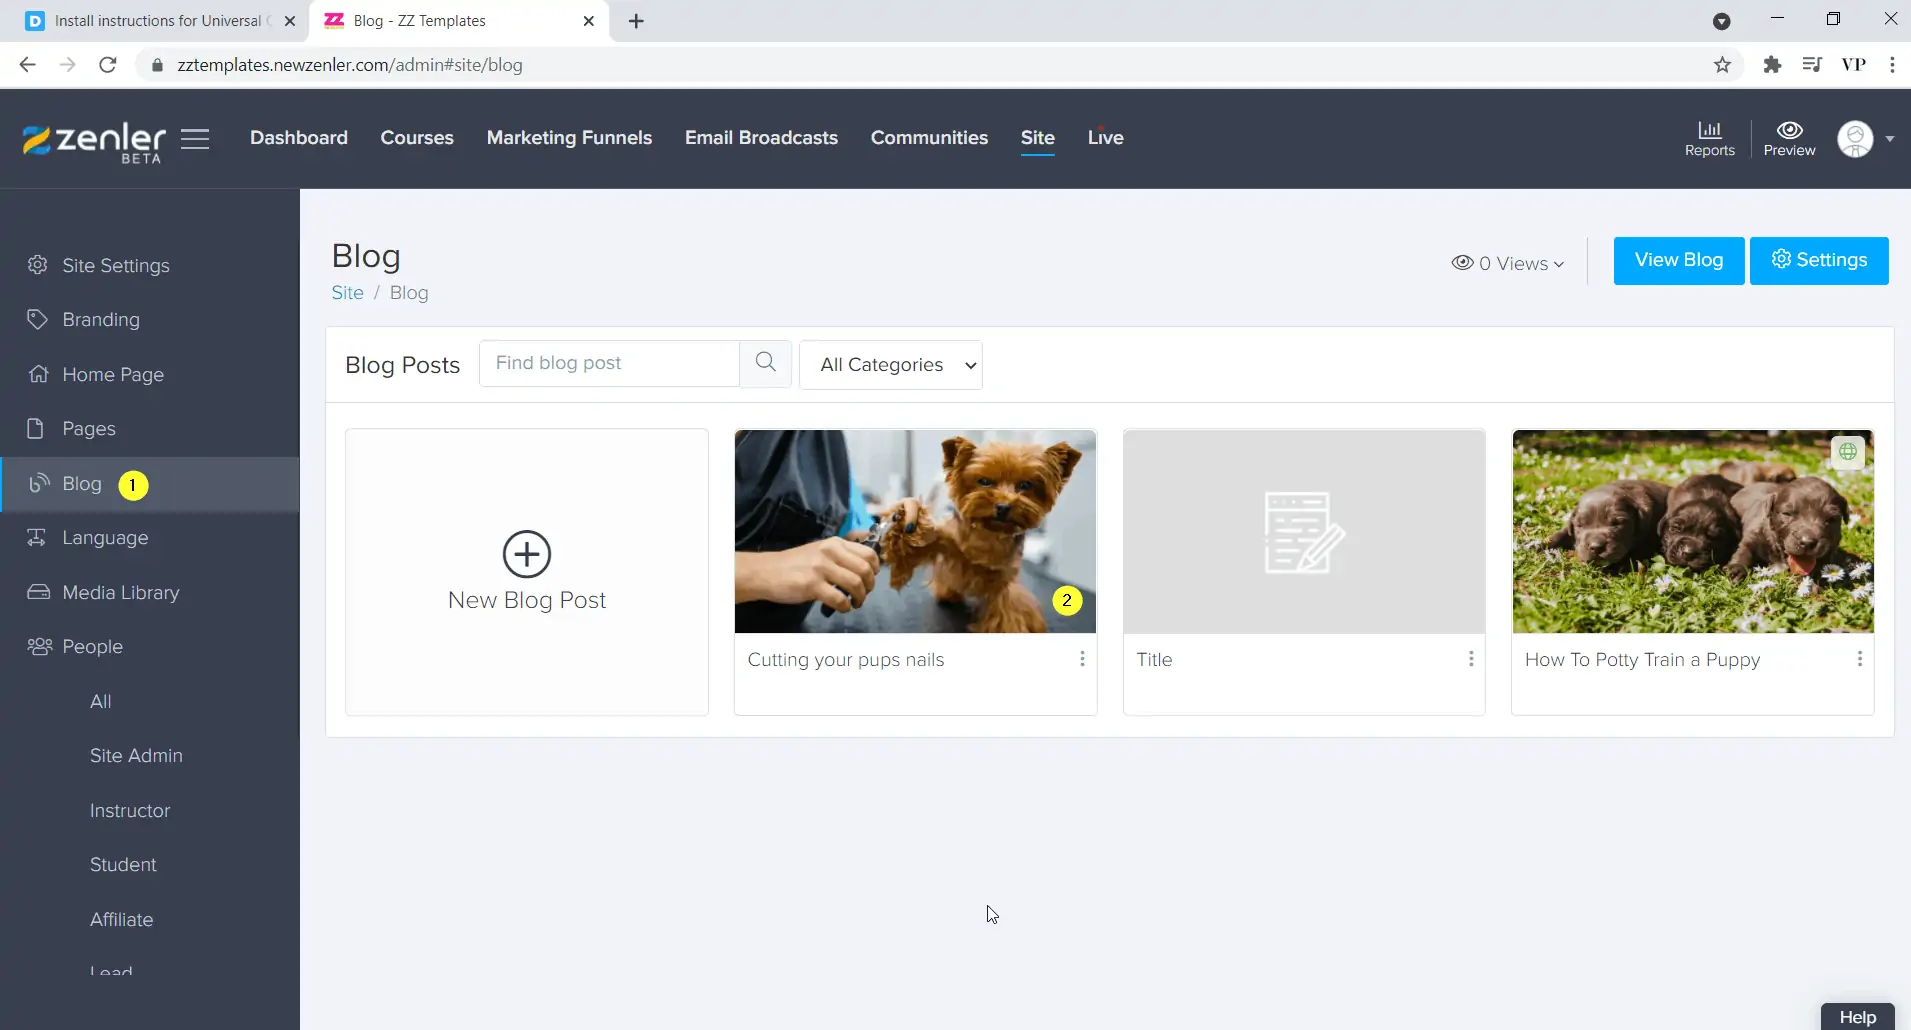
Go to the dashboard of your New Zenler site and open the blog post to which you want to add the comment plugin.

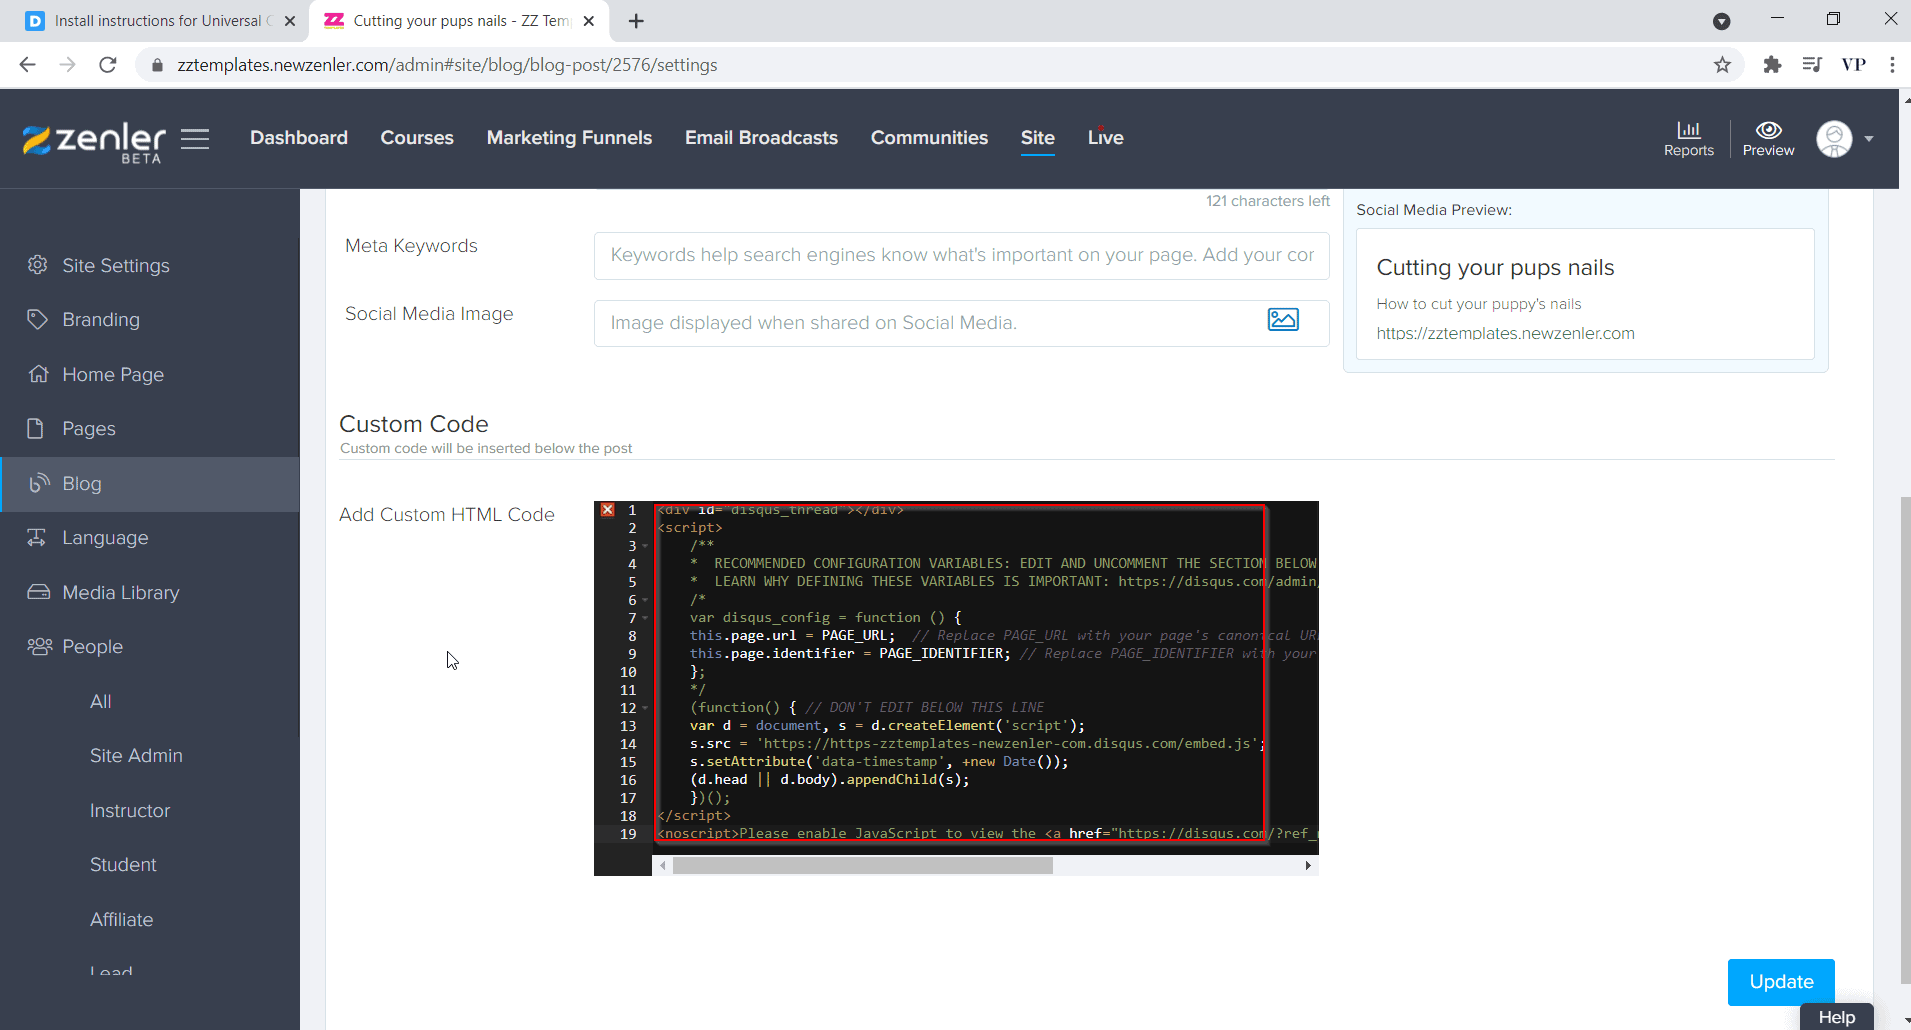
Open the settings for the blog post and scroll down to the Custom code editor.

Paste the code in the code editor and click on Update at the bottom

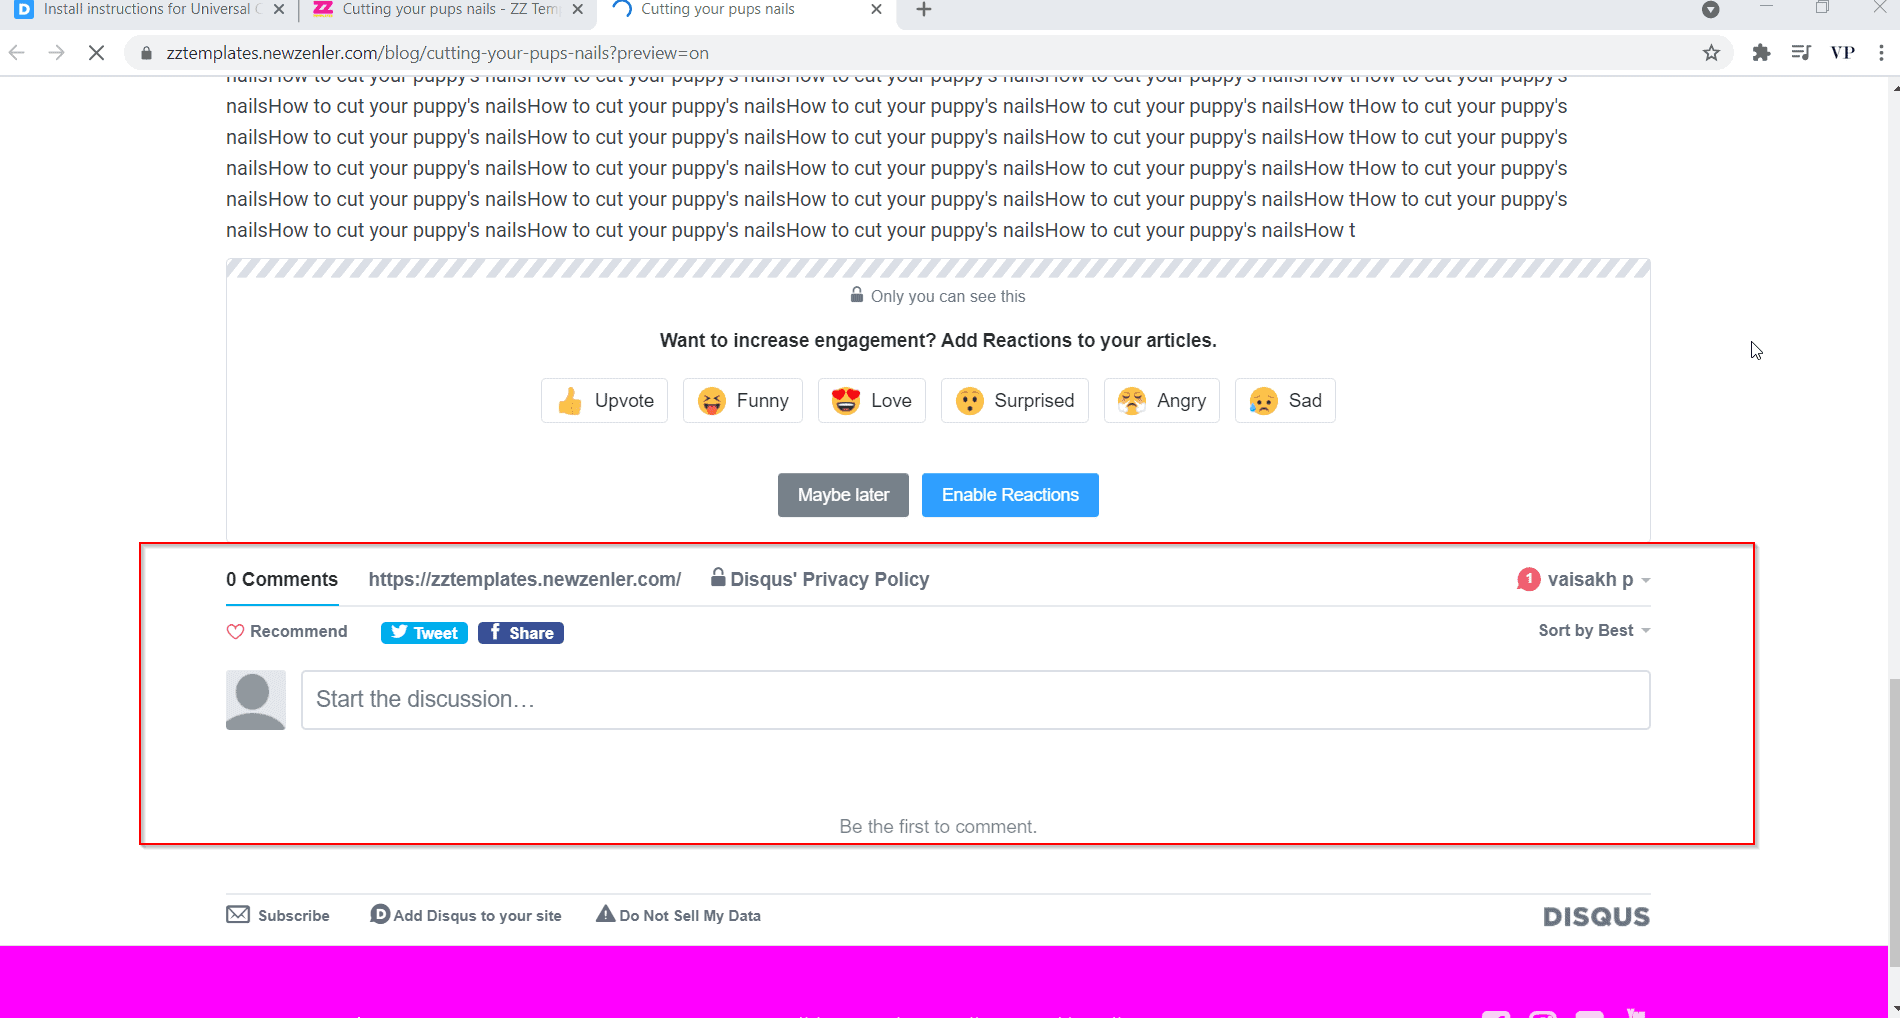
There you go! You can preview the blog post and scroll down to the bottom to find the comments section.

Join New Zenler
Full featured free trial. No Credit Card Required. Create your free school today!
Method 2: Using Facebook Comments Plugin
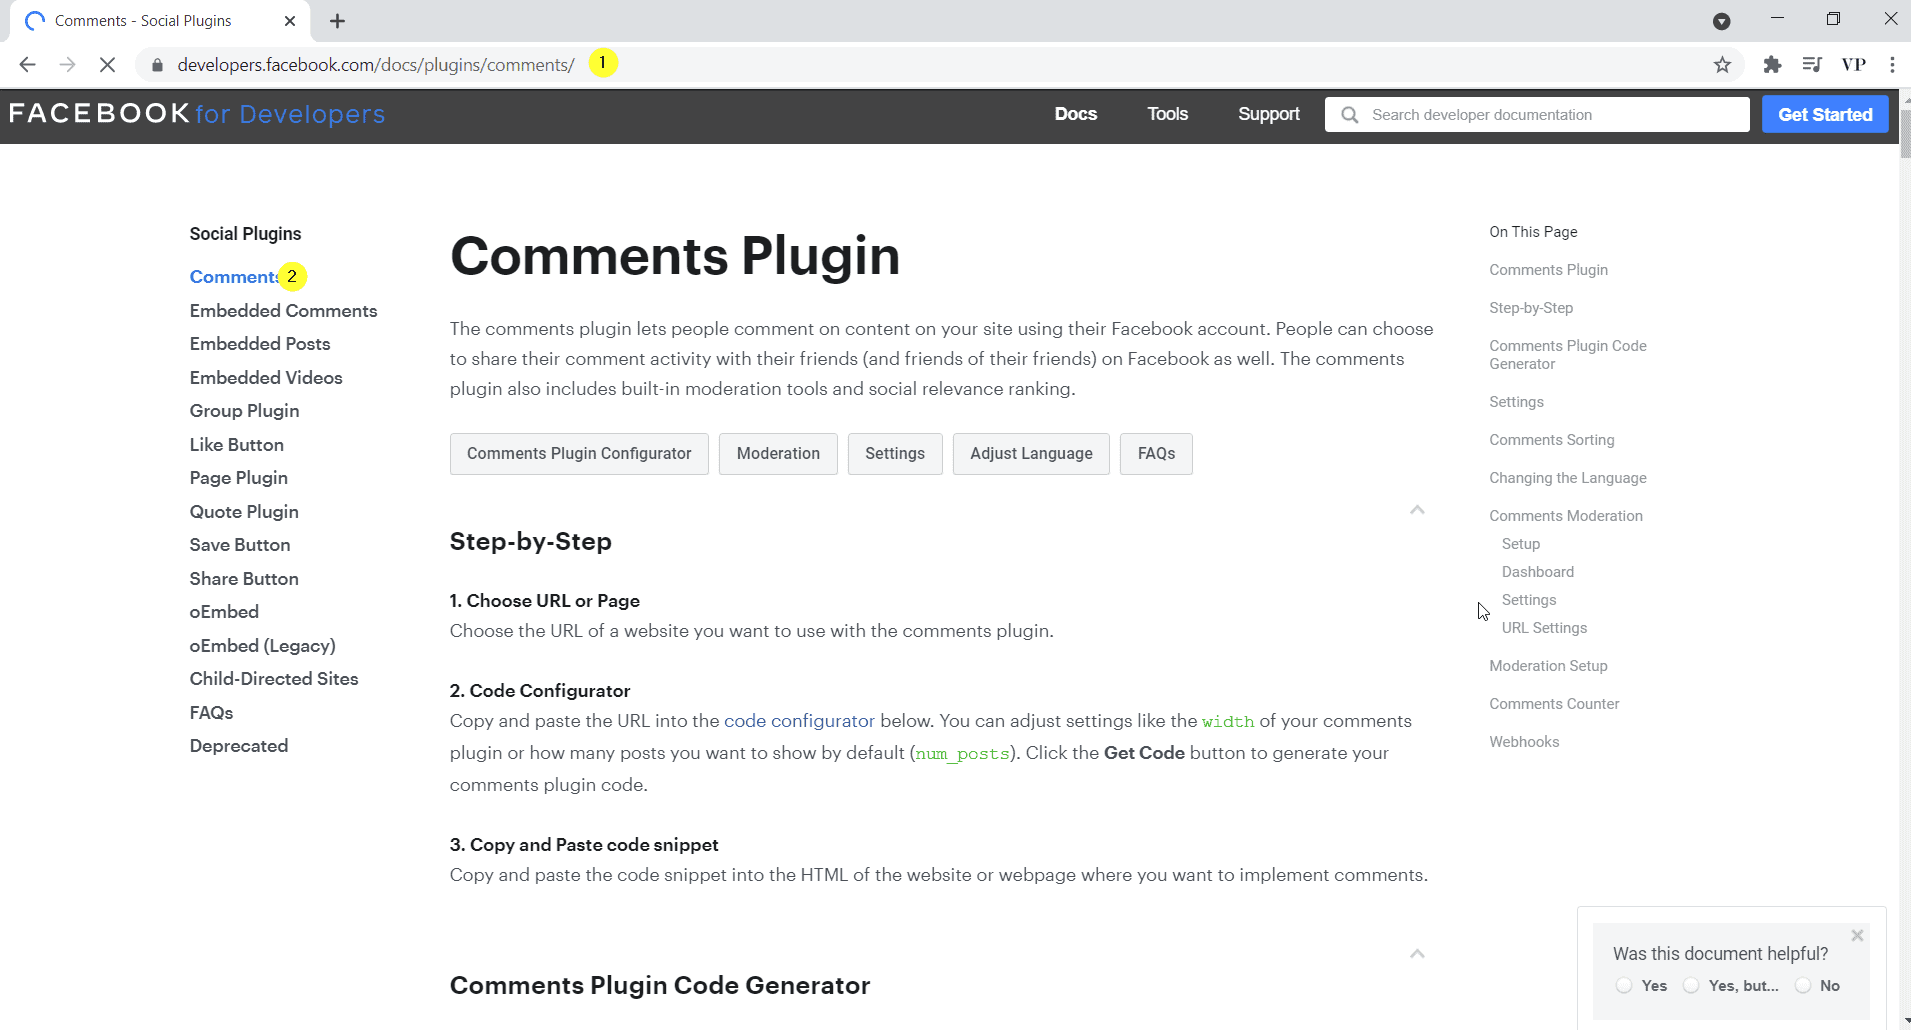
Step 1: Go to Facebook's Developer page.
Go to the Facebook Comment plug in page using this Link and click on comments from the left panel.

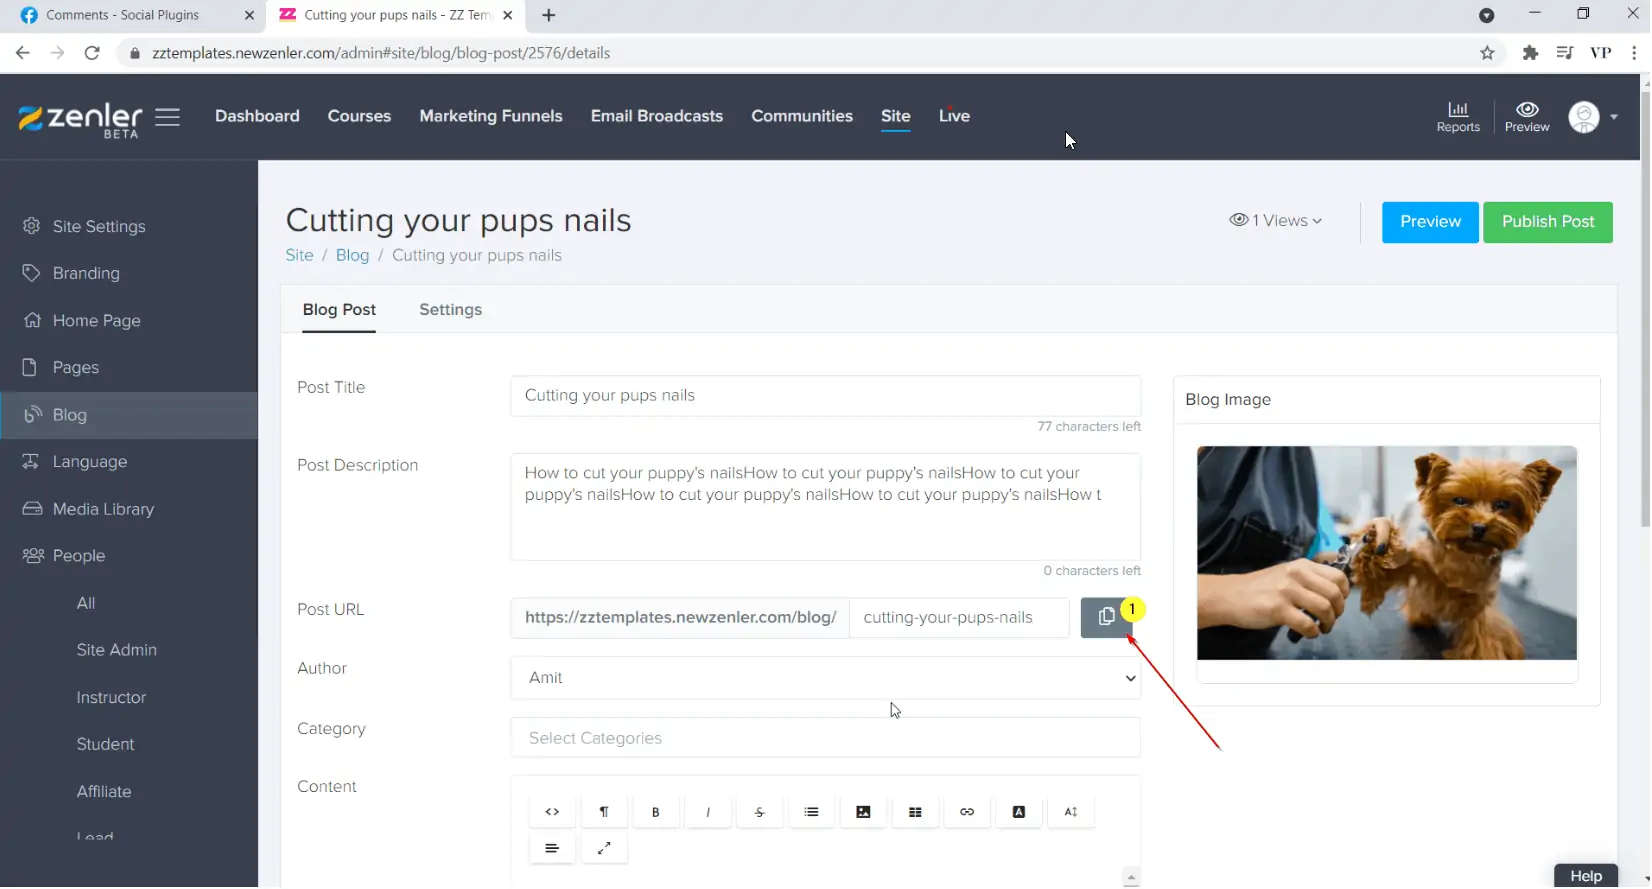
Step 2: Go to your blog post on New Zenler to get its URL.
On new tab, open your New Zenler site and go to the admin dashboard. Go to the blogs section and open the blog post to which you want to add the comments plugin. From there, copy the URL for the blog post as shown in the image below.

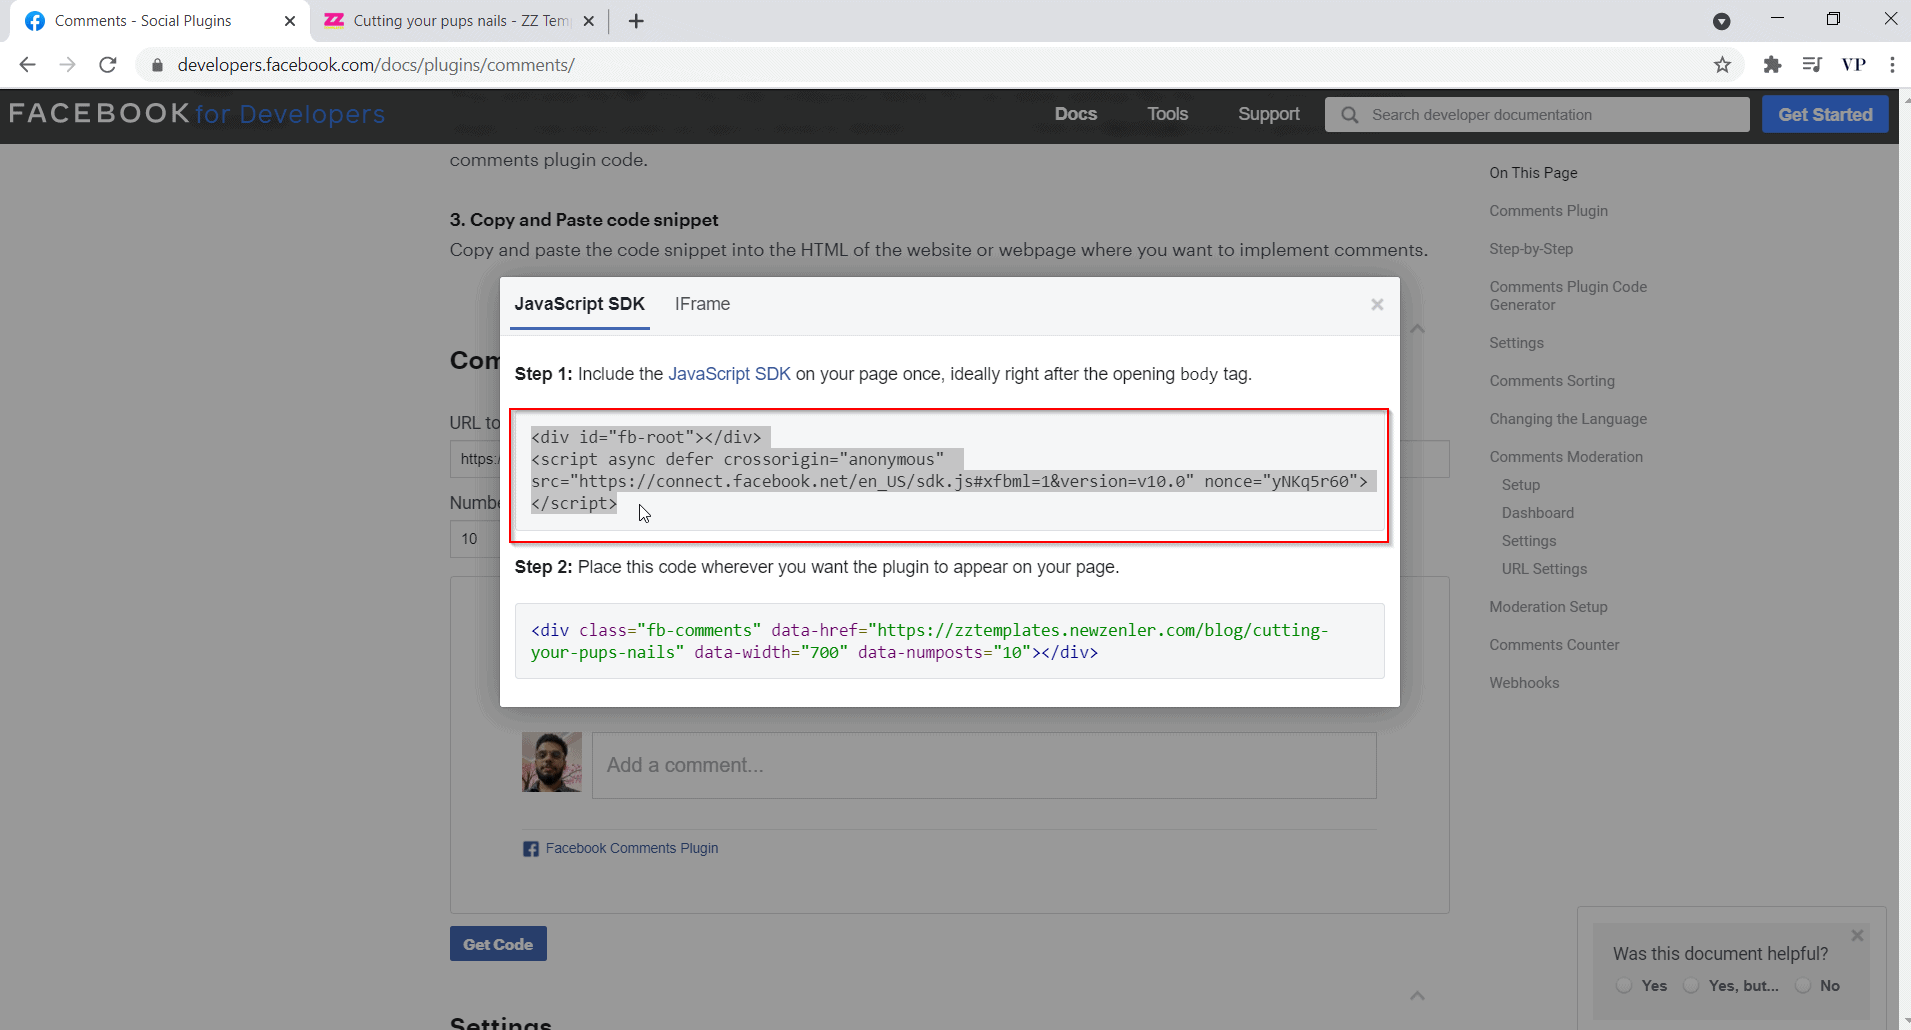
Step 3: Set up Facebook Comment Plugin
Go back to the previous tab, where the Facebook Comments Plugin page is open, and scroll down till you see the Comment Plugin Code Generator.
Paste the URL of the blog post in the first box and fill in the next two boxes as given in the image below. Then click on the "Get Code" button below.

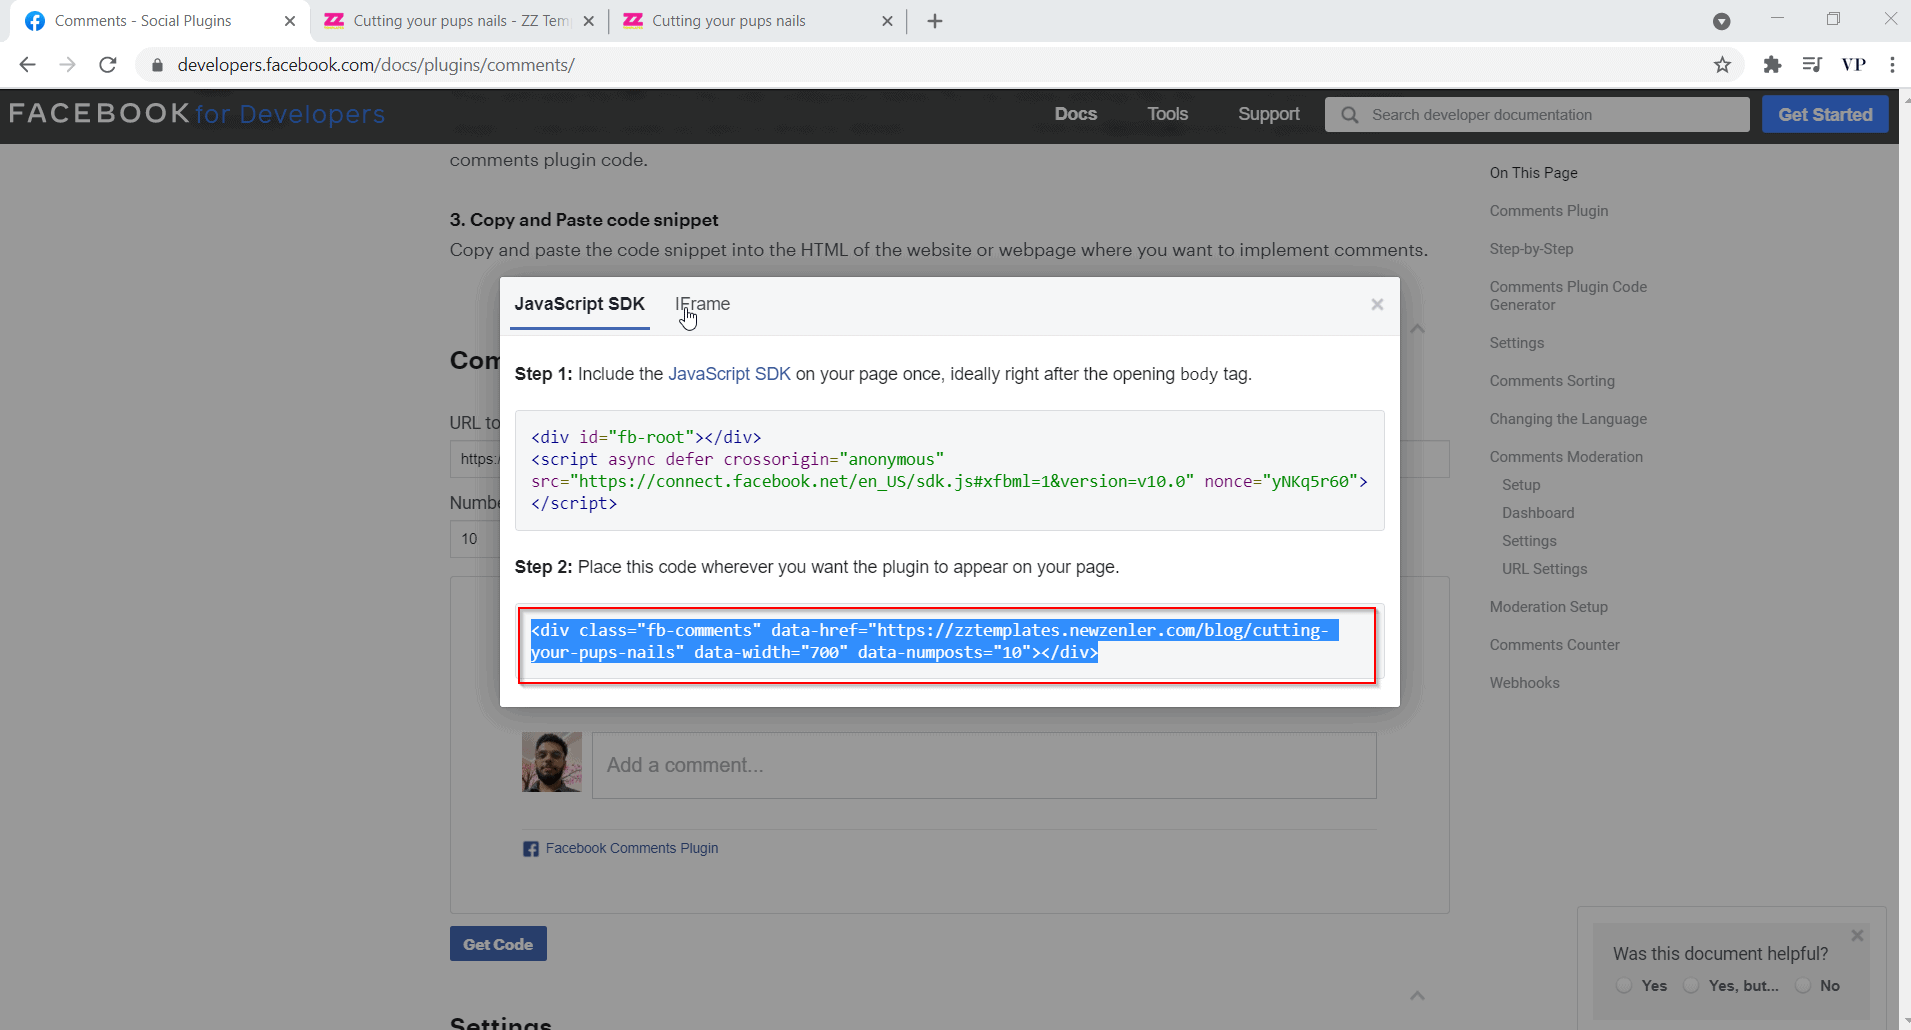
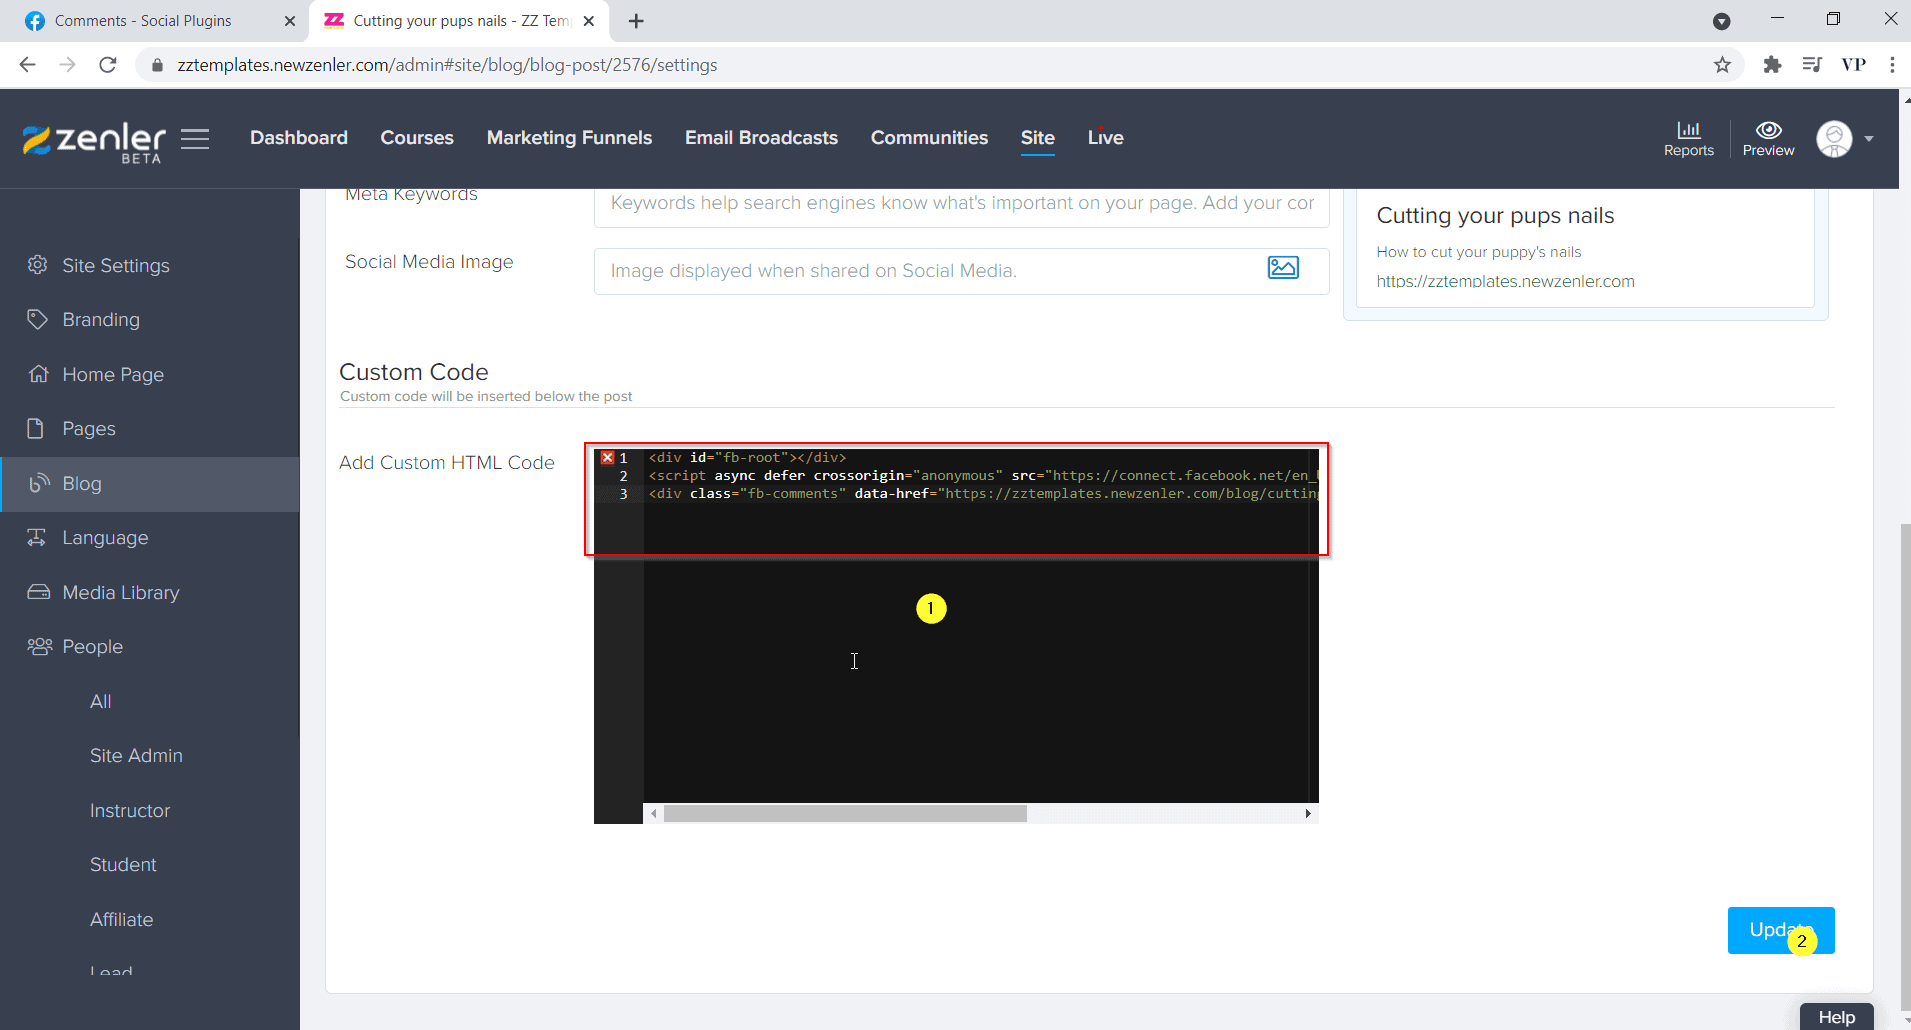
Step 4: Paste the Code in the code editor of your blog post
On the next tab go to the settings of your blog post by clicking the settings button at the top.
Now go back to the previous tab and copy the first code and paste it in the code editor of your blog post, which you can find if you scroll down in the blog post settings page. Similarly copy the second code and paste it the same way below the first one in the code editor and click on "update".

Copy the first one from the two and paste it in the Code editor.

Copy the second one from the two and paste it in the Code editor.
Once you have completed copy and pasting the code, it should look something like this.

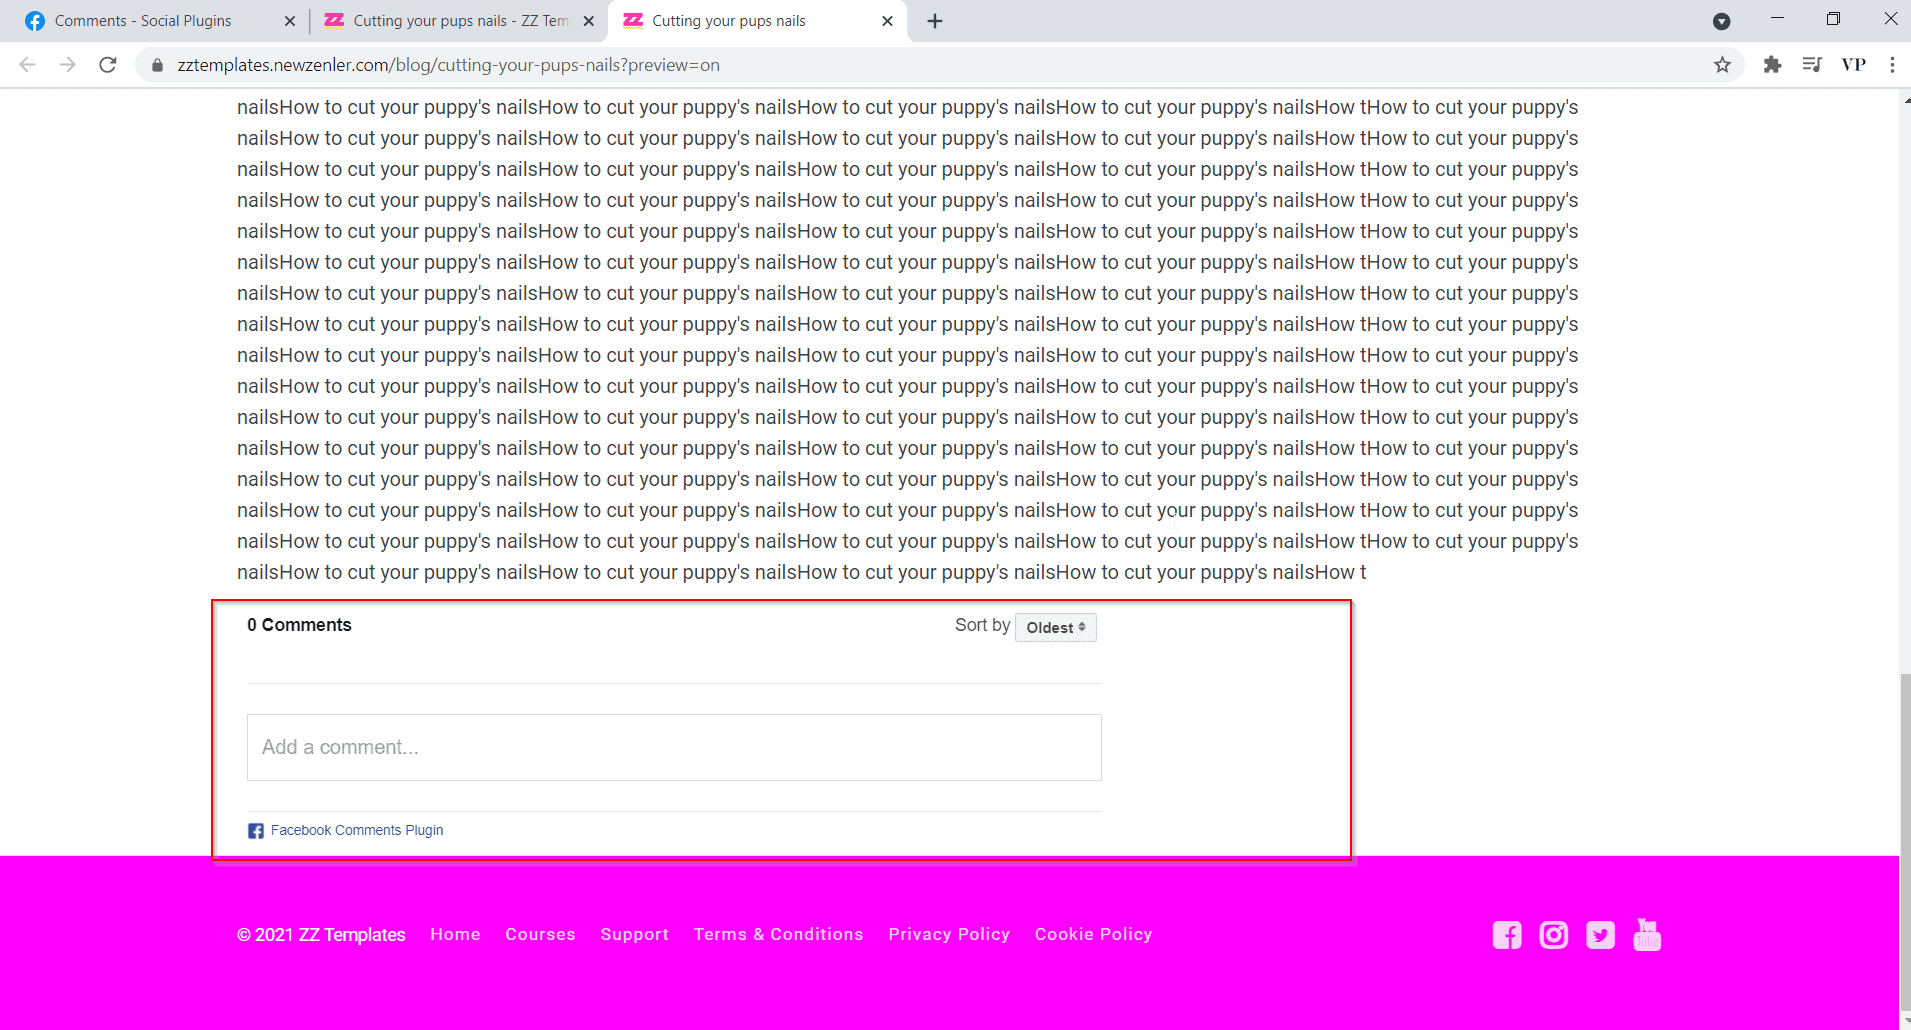
Now click on Update and voila it's done. You can preview the post and scroll down to the bottom to see the comments section.

Join New Zenler Through My Link To Get 10+ Amazing Bonuses.