How To Build A Membership Site on New Zenler
You've decided to build a membership site on New Zenler. In this step-by-step tutorial, I will walk you through the process of building a membership site.
But first, let's dig a little deeper into why you would want a membership site?
The most common use case is so that you can charge monthly membership fees i.e. subscription fees, to your members and in return, you will give them access to a set of digital assets. These digital assets could be a combination of, but not limited to the following items:
- Digital Courses
- Downloadable Files
- Access to Private Groups
- Access to you, the product creator
- And anything else you can think of
Essentially the idea is for you to charge your customers a monthly amount in exchange for access to the aforementioned items.
Some of the internet greats have adopted this mantra of a monthly membership model for a multitude of reasons.
The most common reason being MRR i.e. Monthly Recurring Revenue. This way you can expect a fixed monthly income based on the number of subscriptions.
With a membership site, you will often come across a term called CHURN. Churn in it's simplest explanation is the amount of users/customers leaving your service each month/quarter/year.
For simplicity sake let's say you have 100 monthly paying customers in your course membership. Now let us assume that you have a monthly churn rate of 10%. This means that every month 10 customers are leaving.
As you can see it is much easier to replace 10 customers each month than to find 100 new paying customers every month for your membership course.
Now let's dive into how to go about creating a membership course on New Zenler.
Jump to Section
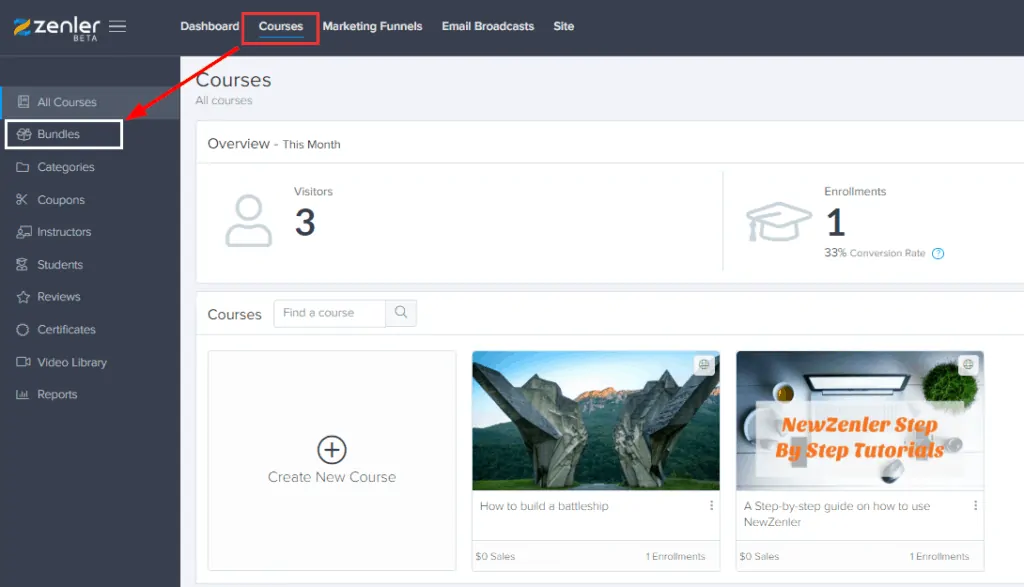
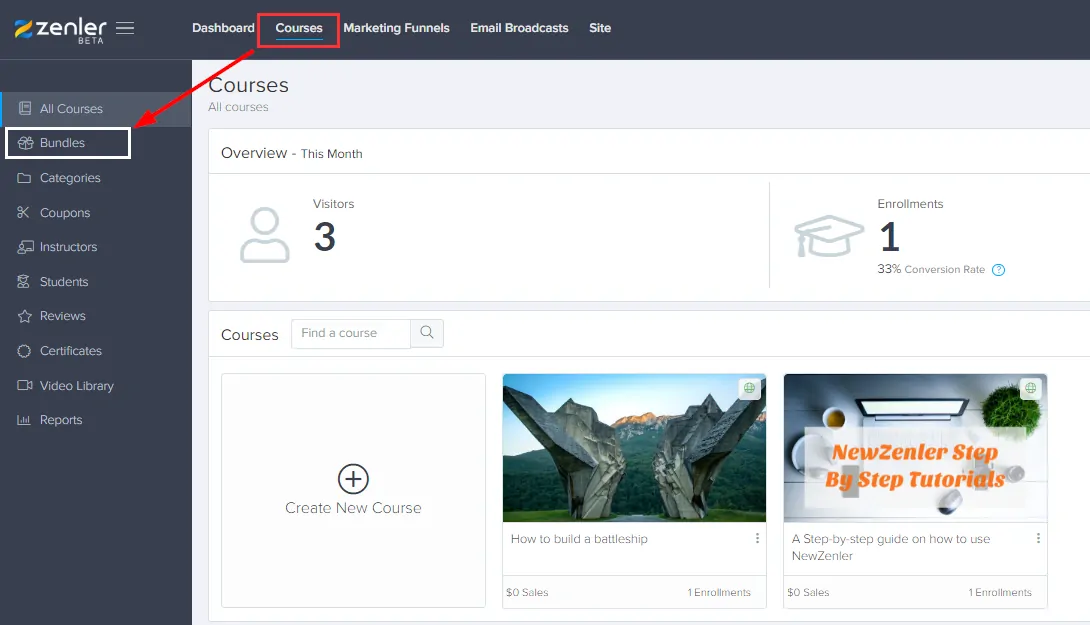
Step 1: Go to Courses > Bundles
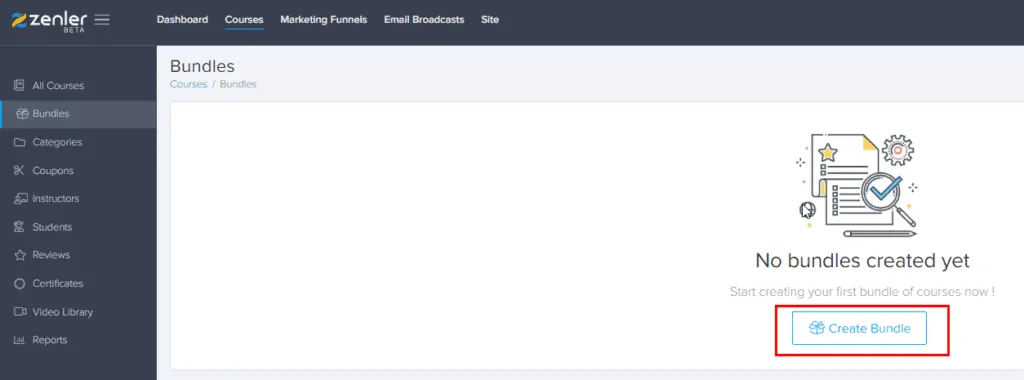
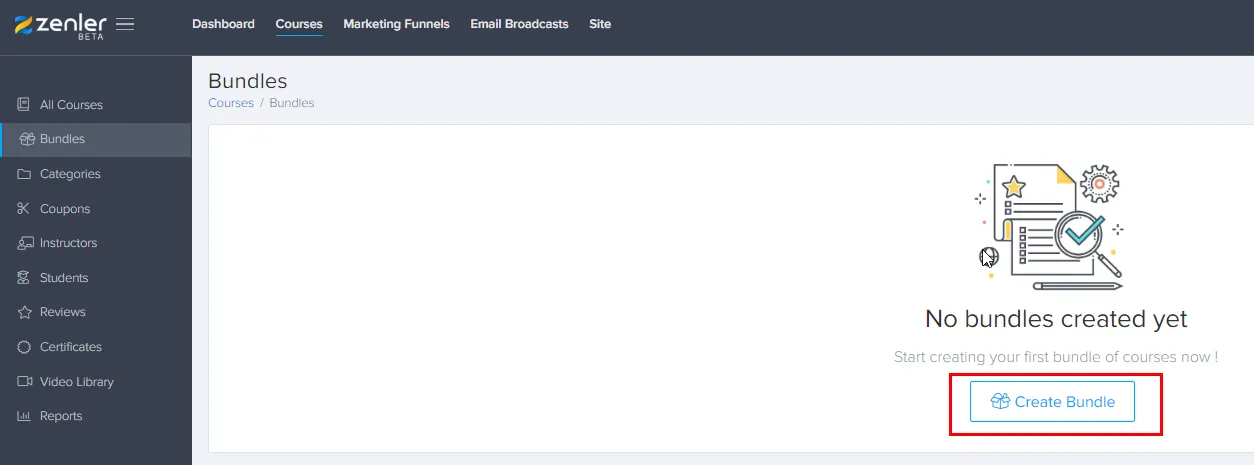
Step 2: Click > Create Bundle
Step 3: Fill in details > Click Create

Use a descriptive term for your course name. This will help your potential customers self-identify if the membership bundle is a right fit for them.
Step 4: Select which courses/assets to include in the bundle.

After you've added the courses/assets to your bundle you can click on the publish bundle button in the top right corner.
Click on Content tab to see what courses/assets are part of the bundle.

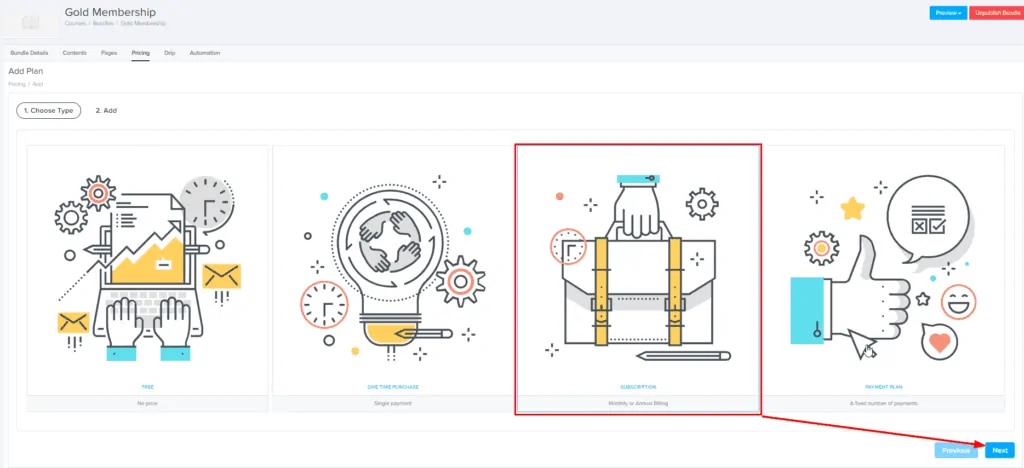
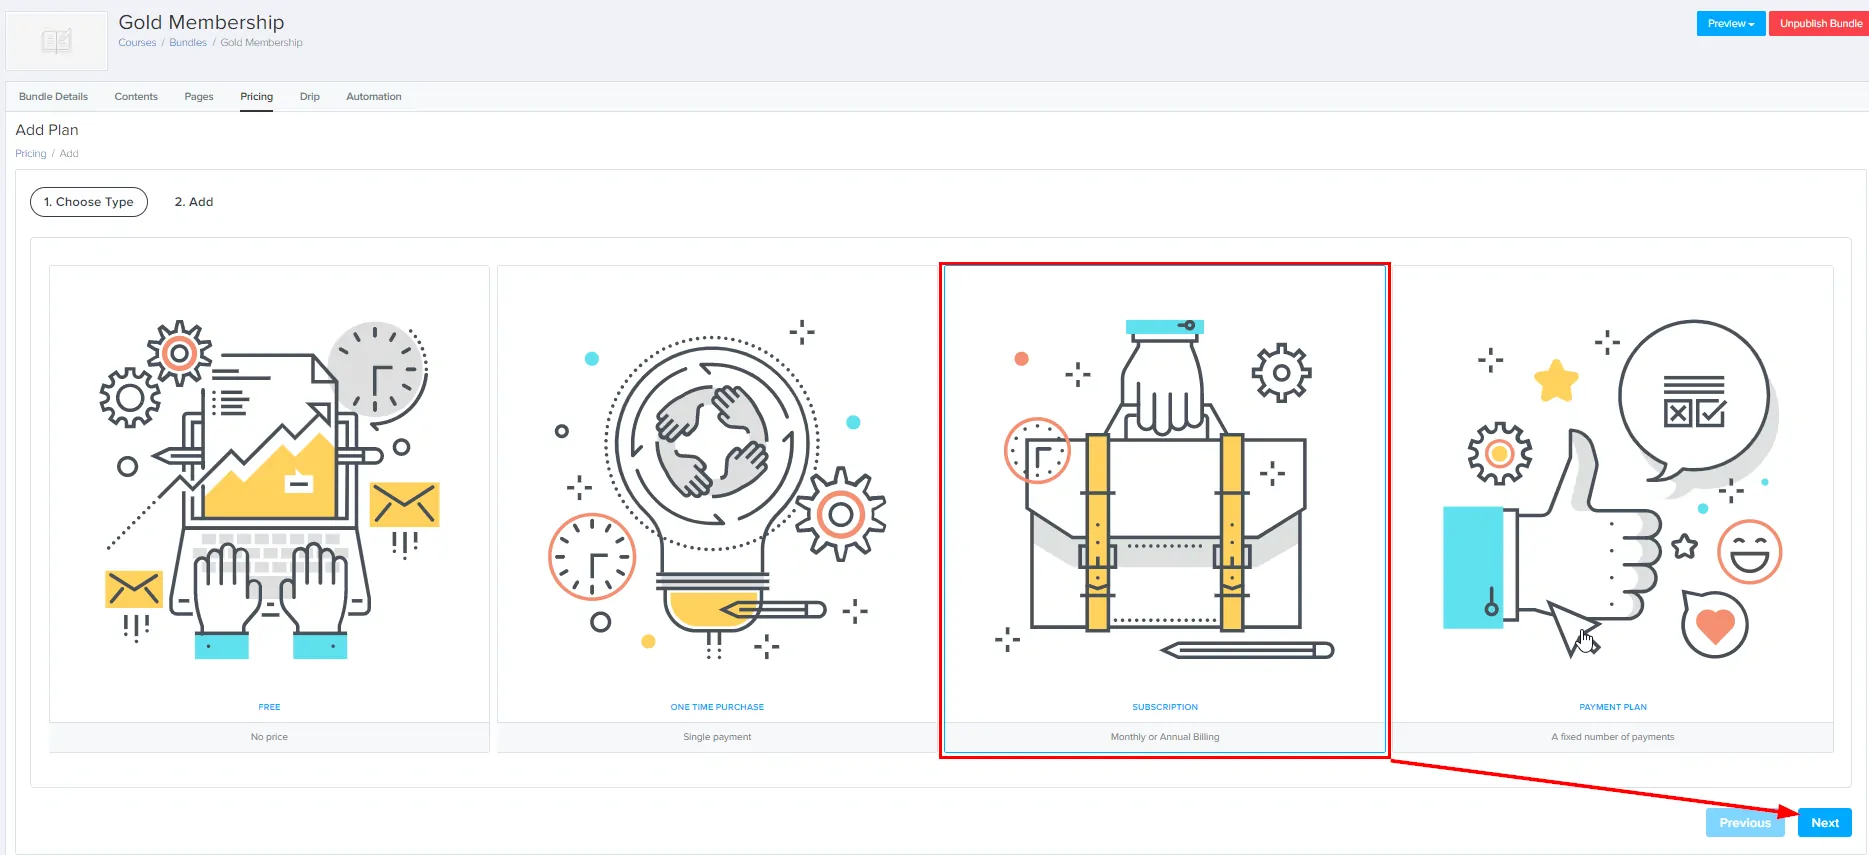
Step 5: Create a pricing plan for your bundle.
Pricing Tab > Choose Type > Click Next
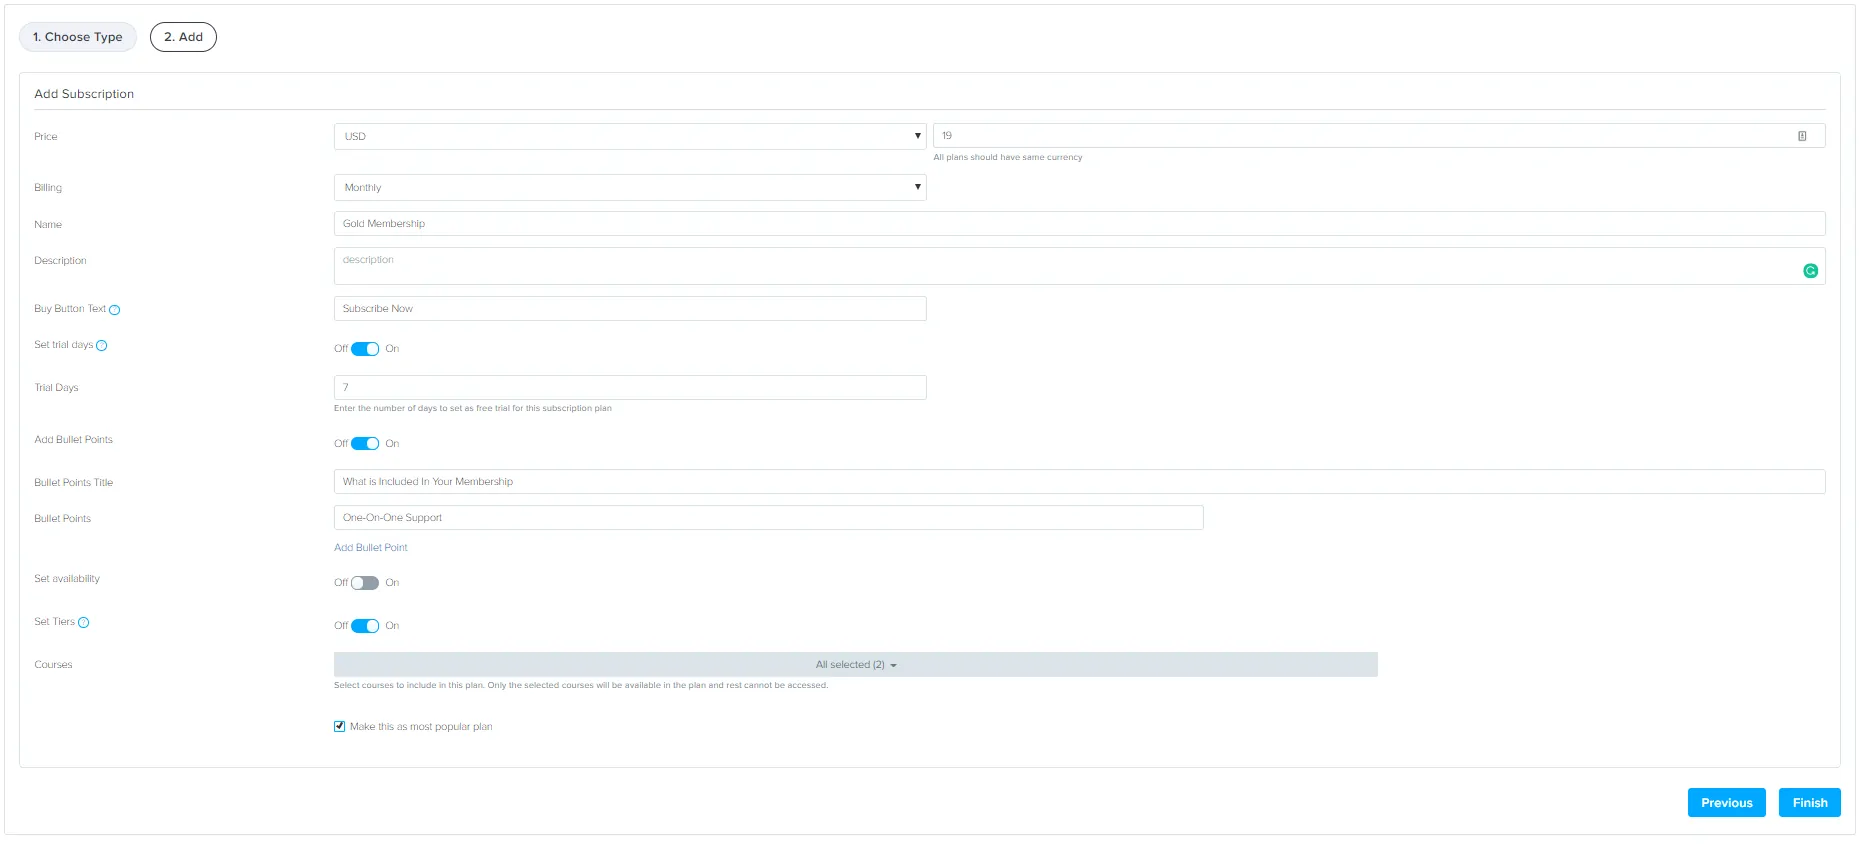
Enter details for your pricing plan.
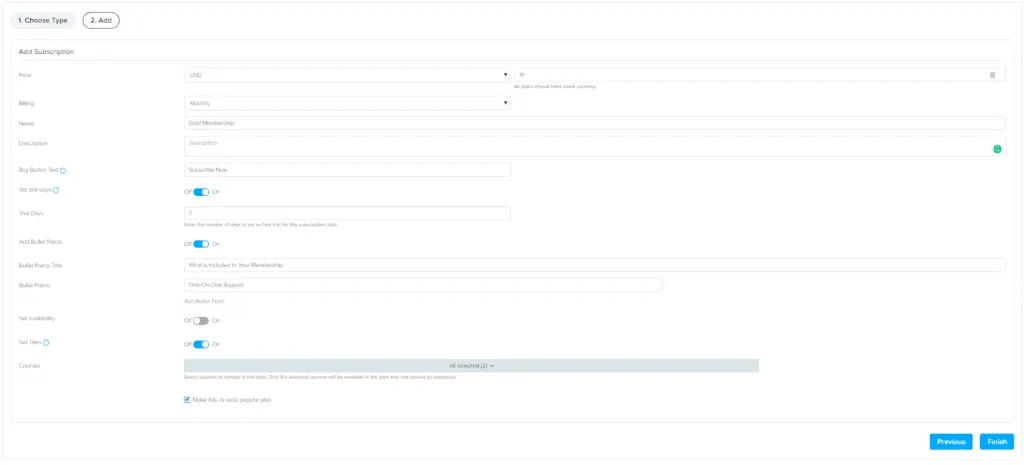
You will be asked to enter the following details:
- Price (in USD)
- Billing (Monthly, Yearly, Every 3 Months, Every 6 Months, Custom)

- Name (in this example I'm calling it Gold Membership). You may have different tiers like Chimp, Gorilla, Godzilla. Again make it descriptive.
- Description
- Buy Button Text
- Trial Days (One of my favorite feature of New Zenler is trial days). You can allow your customers to do a trial run before they can commit to purchasing.

- Bullet Points
Here you can mention everything that is included in your membership bundle. - Set Availability
You can choose a start and end date for this membership bundle. - Set Tiers
Another golden nugget from New Zenler. You can allow access to certain courses from the tiers level. This will come in handy if you have multiple tiers like Silver, Gold, Platinum. - Make this course popular
This is a checkbox that can be checked/unchecked on a course by course basis.
Once you've created the pricing plan you can go back to the pricing tab to look at it. Here you will see visual labels in front of the pricing plans to let you know all the options you have activated for that particular pricing plan.

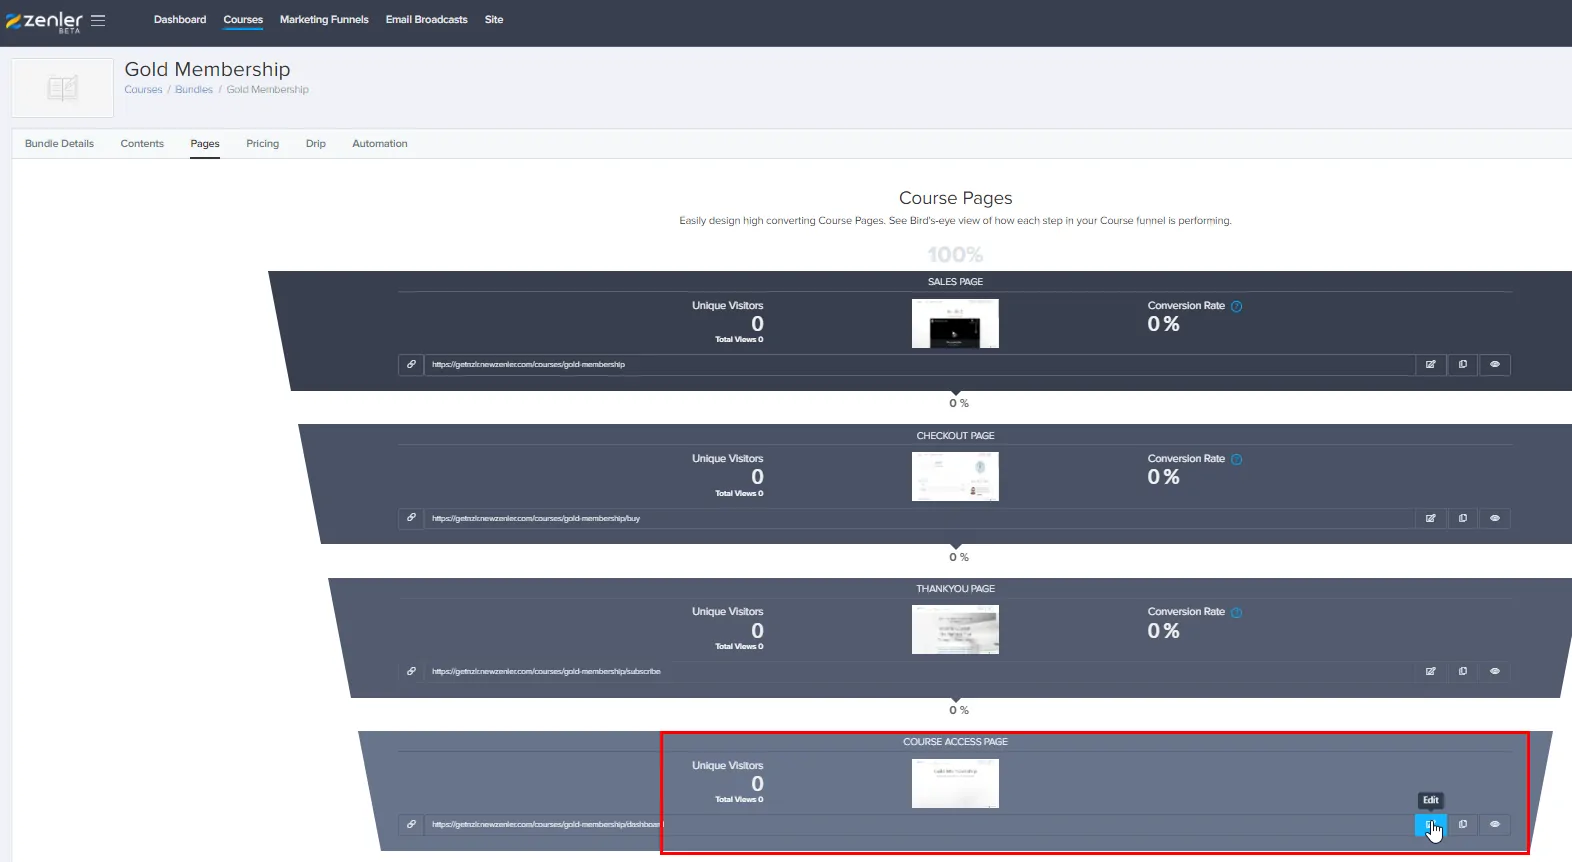
Step 6: Pages > Edit Course Access Page
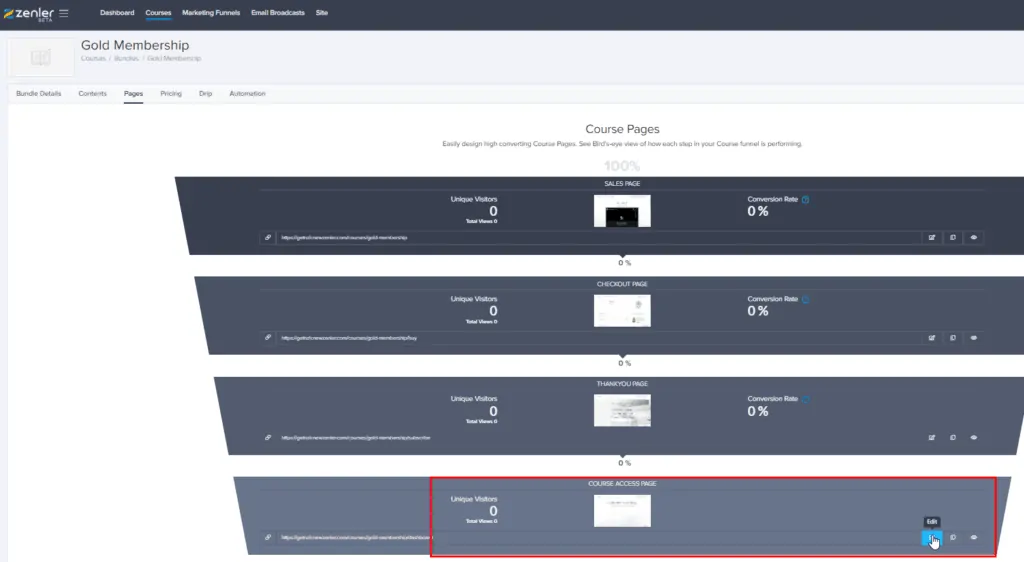
For your course membership site, you may edit the access page from this visual funnel. This is great because you now have total control over what content you show to different students based on their course membership level.
Step 7: Create a coupon (optional)
Course > Coupons > Create Coupon

If you'd like, you can create a coupon for your membership site.
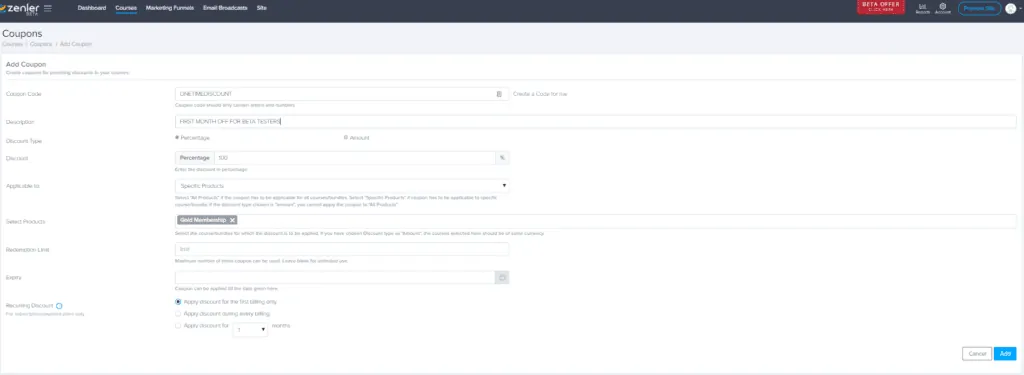
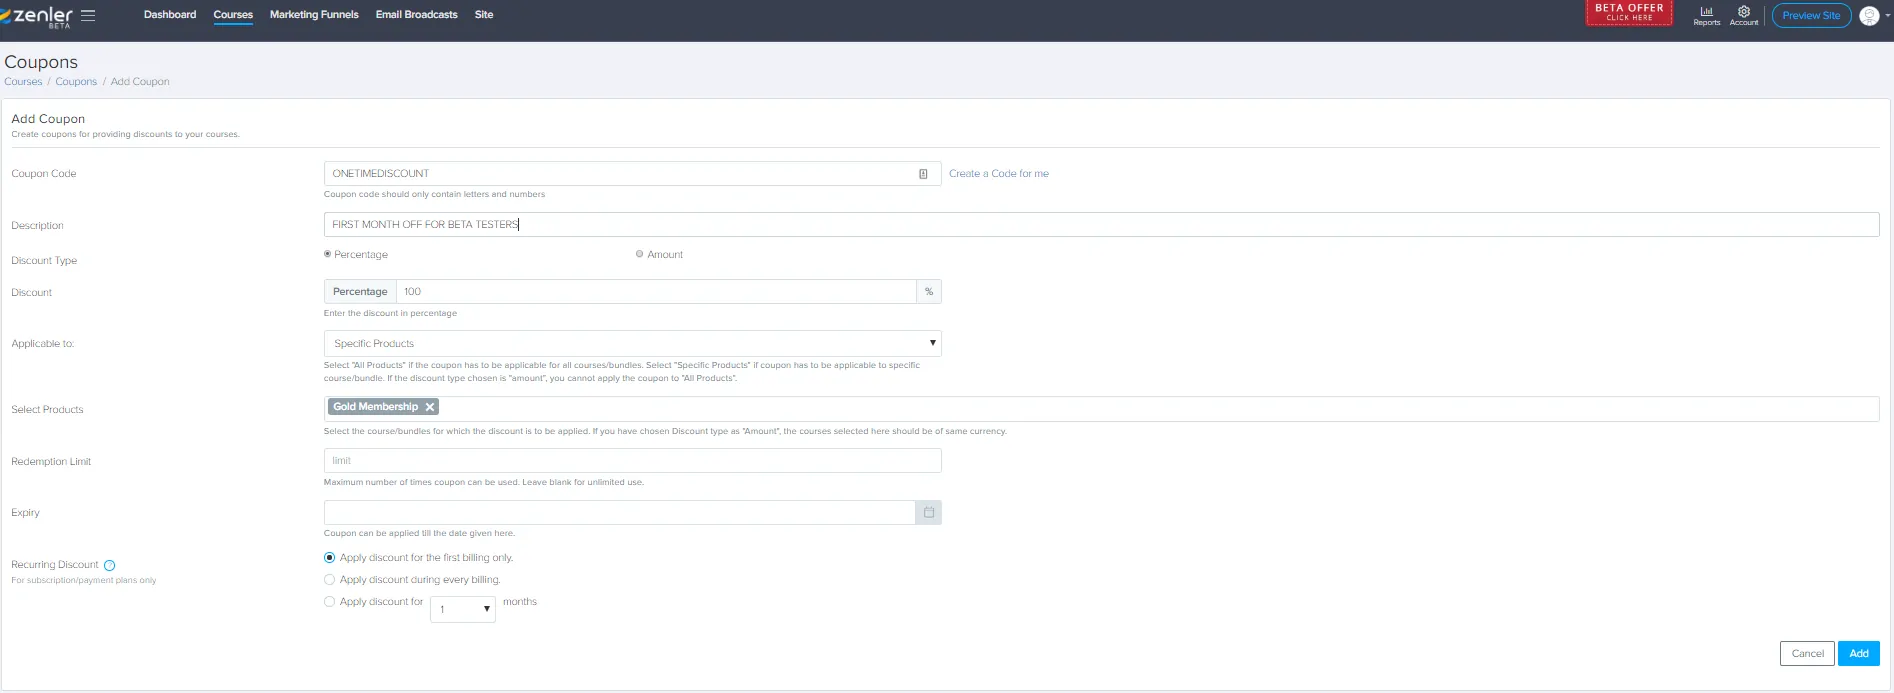
If you'd like, you can create a coupon for your membership site. At the coupon creation screen, you will be able to select your newly created bundle i.e. course membership site.
You may choose between a percentage off the membership bundle price or dollar amount. The best part is, New Zenler allows you to limit the coupon to first billing only.
This can come in handy if you're trying to promote this bundle and maybe you want to give the first month free to your students as a promotion.
You can also set the expiry for your coupon and even limit the number of uses by inserting a number in the redemption limit box.

Once the coupon has been created, grab its URL and now you can place it anywhere on the interwebs. You can add it to a button, or email it to your list.
I hope you were able to follow along in this step-by-step tutorial on how to create a course membership site in New Zenler.
About Me
Amit Arora
First off, thank you so much for stopping by! I started my course creation journey in 2015 when we had our 1st baby boy. My wife was home on maternity leave and we came up with the idea to create an online course while she had the time off from work.
Four years later....








When is this platform available!
Hey Loretta,
The platform is available right now. It is still in beta, which means there are constant changes happening to the platform. But nothing that’ll affect the front end of your site or your students. You can request a beta invite key if you’d like, so you can try out New Zenler before you decide to buy. You can either email me directly amit(at)getnzlr.com or you can fill out the beta request form at https://getnzlr.com/bonus